Recalbox Forum

    • Register
    • Login
    • Search
    • Recent
    • Tags
    • recalbox.com
    • Gitlab repository
    • Documentation
    • Discord

    Your recalbox / Vos recalbox

    Your recalbox
    72
    133
    160201
    Loading More Posts
    • Oldest to Newest
    • Newest to Oldest
    • Most Votes
    Reply
    • Reply as topic
    Log in to reply
    This topic has been deleted. Only users with topic management privileges can see it.
    • godhunter74
      godhunter74 @Gecko last edited by

      @Gecko
      J'ai joué aussi avec une PS2 si ca t'intéresse !!!
      https://forum.recalbox.com/topic/5960/pistation-2
      J'aurais bien aimer voir l'intérieur de la tienne si c'est possible ???

      Relier un écran I2C et afficher des informations sur les roms

      1 Reply Last reply Reply Quote 0
      • Gecko
        Gecko last edited by

        @godhunter74
        J'ai vu ton projet, pas mal du tout, moi je ne voulais absolument pas changer l'aspect exterieur de la console, donc j'ai gardé le lecteur DVD à l'interieur qui supportait bien les bouton et la "façade" du lecteur, du coup pas de DD, tout est sur la microSD (128 Go pour le coup).
        Je n'ai pas de photos de l'intérieur de la PS2, et je l'ai donnée à un amis, donc je ne pourrais pas en faire. Mais si t'as des questions particulières, envoie moi un MP.

        1 Reply Last reply Reply Quote 0
        • godhunter74
          godhunter74 last edited by godhunter74

          @Gecko Je voulais savoir si tu as utiliser les bouton power et open close et si oui comment d'un point de vue hardware

          Relier un écran I2C et afficher des informations sur les roms

          1 Reply Last reply Reply Quote 0
          • Gecko
            Gecko last edited by

            @godhunter74
            J'ai simplement utiliser le bouton power comme bouton on/off, j'ai donc récupéré la petite pcb avec les bouton originaux, j'ai soudé des petits fil sur les connecteurs du bouton power (il y a quatre point de soudure, il faut en prendre 2 à des extrémités opposées) et ensuite les 2 fils sont reliés au GPIO 5 et 6 de la Pi (Pi 3 modèle B, c'est peut-etre différent pour une Pi 2).
            Voici un lien qui explique cela : https://github.com/recalbox/recalbox-os/wiki/Ajouter-un-bouton-on-off-a-votre-recalbox-(FR)
            Je voulais rajouter une LED mais j'ai pas eu le temps.

            1 Reply Last reply Reply Quote 0
            • silentrick
              silentrick last edited by silentrick

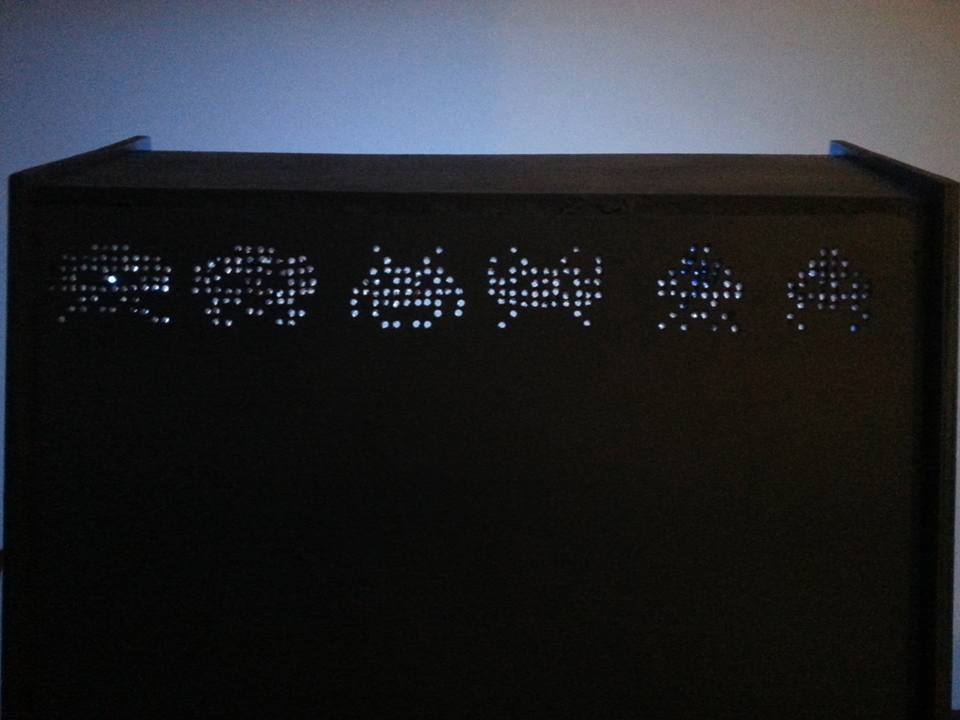
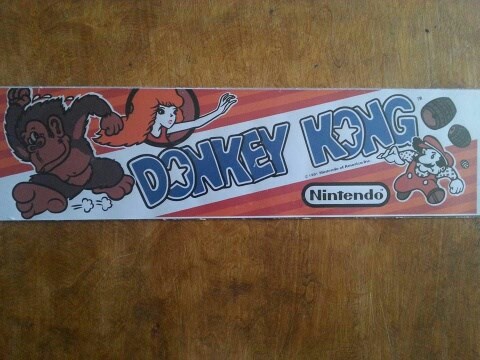
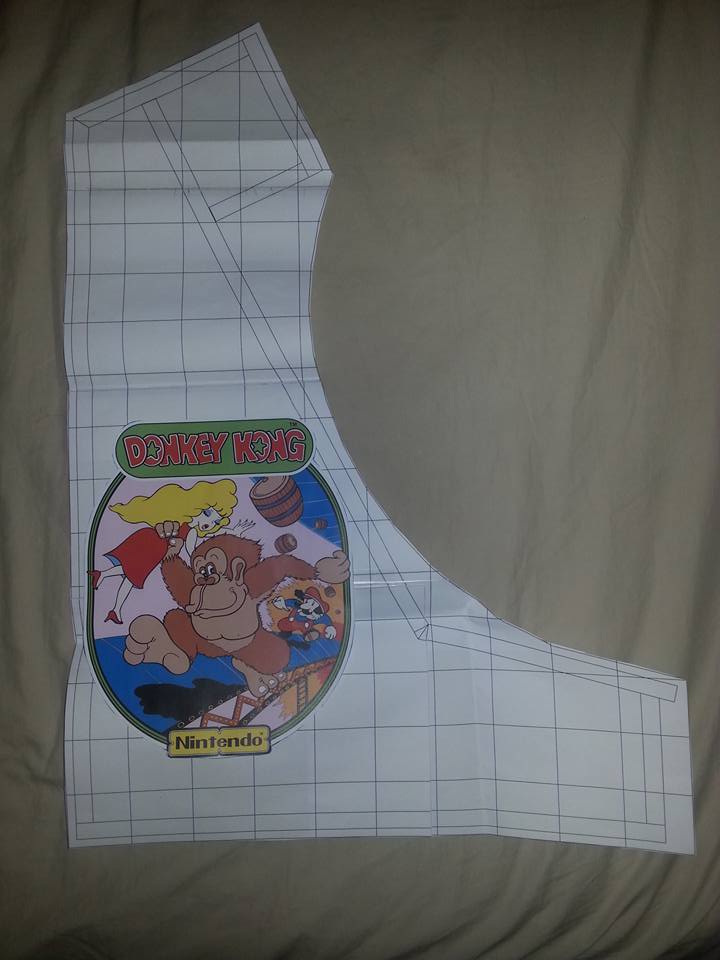
              Hi ! I would like to show you my bartop inspired by Donkey Kong's classic cab. Powered by rpi 3b and your OS. I've tried not to spend so much money re-using things, especially painting, tools, and printable A4 white sticker paper (used to redo cartridge stickers of my old VCS atari). 0_1497284381978_16997860_10209256723915365_3206574122273229765_n.jpg
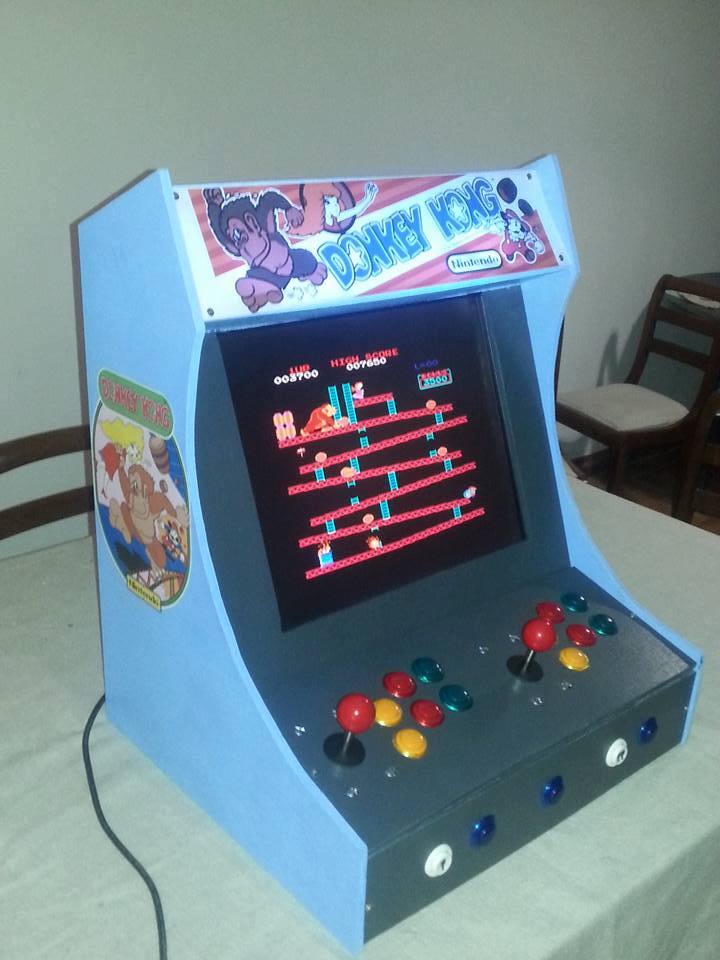
              I made "vintage Space Invaders holes" to let warm air go out, and it was a surprise to see LED of the marquee backlighting the wall. o_O
              0_1497285343450_16938619_10209256729035493_7481756473457887769_n.jpg
              I spent a lot of my money during the 80's, in arcade, playing with the real cabinet. 😕
              0_1497286142961_16864844_10209257033123095_2699893877560941928_n.jpg
              0_1497286450953_16508663_10209108384806980_7855269726893019532_n.jpg
              Now I got mine at home for my family and I. 😉
              0_1497286819010_16998664_10209256728795487_6035976233820770046_n.jpg
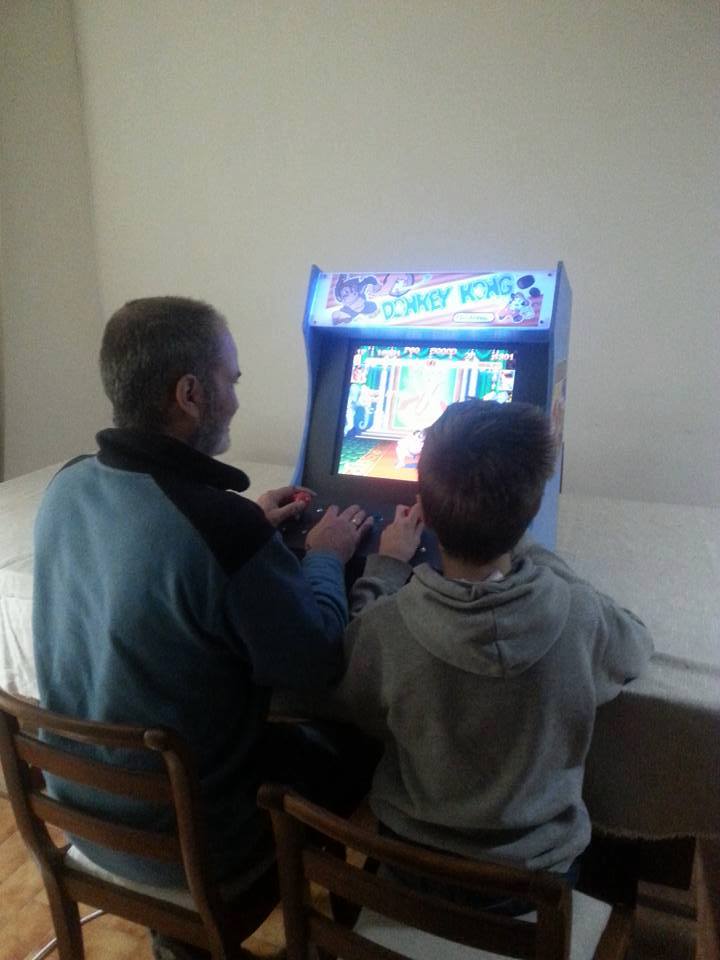
              Nothing would be done without your O.S. Thank you so much. God bless recalbox O.S. 😉

              1 Reply Last reply Reply Quote 3
              • Kithera
                Kithera last edited by Kithera

                Using a nice lego version of the NES classic. It wasn't quite as cheap to create, but at least I could find one. Very fun!

                0_1498842442334_15540707_1797905470484238_3327009042545574870_o.jpg

                1 Reply Last reply Reply Quote 0
                • Kithera
                  Kithera last edited by

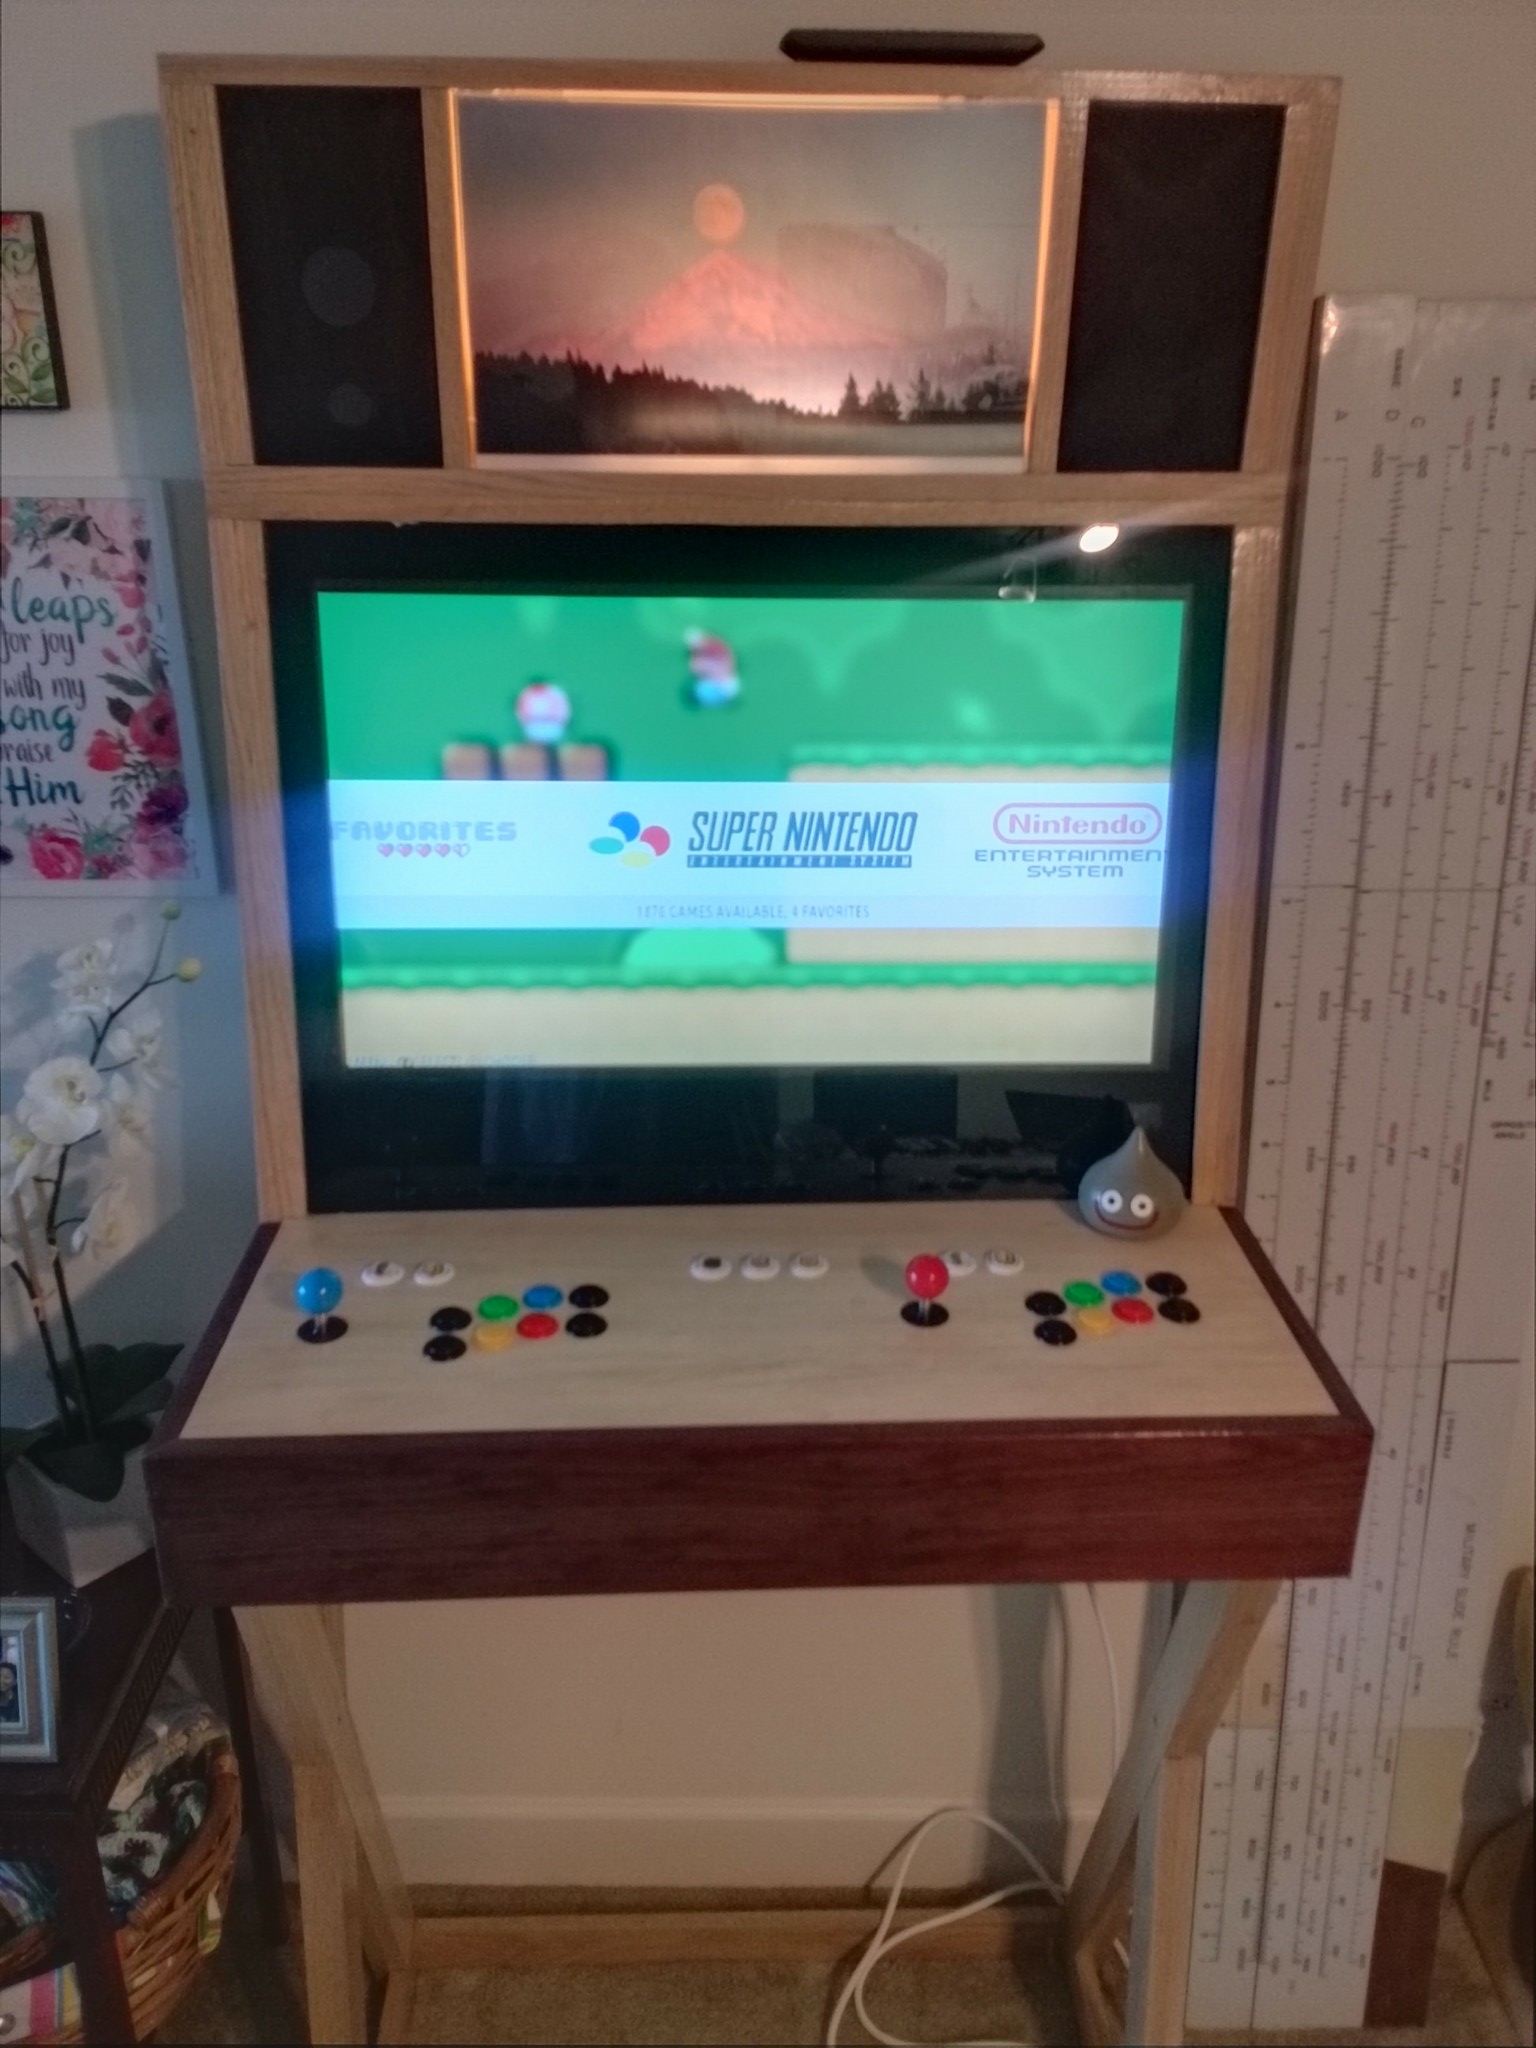
                  I've also recently retrofitted my arcade with a RPi3 and Recalbox. I'm really pleased with how this turned out.

                  I build this arcade over three weekends (about ~6 hours per sat**day), followed by a week of frequent application of polyurethane. The controls are Seimitsu PS-14-GN buttons, and Seimitsu LS-32 sticks. Although no longer necessary, I used an Ultimarc iPac keyboard encoder for the input. I am especially pleased by the lack of screws on the playing surface, the Mario themed inserts on the command buttons, and the general craftsman style appearance.

                  A lot of details were taken from the site: http://www.slagcoin.com/joystick.html.

                  Final appearance:
                  0_1498842902143_16487167_1821481781459940_4115855451401573330_o.jpg

                  Testing the RPi3 for the first time. I was really pleased with the performance even with "demanding" PS1 games.
                  0_1498842914629_14114816_1742313206043465_6426066394624490339_o.jpg

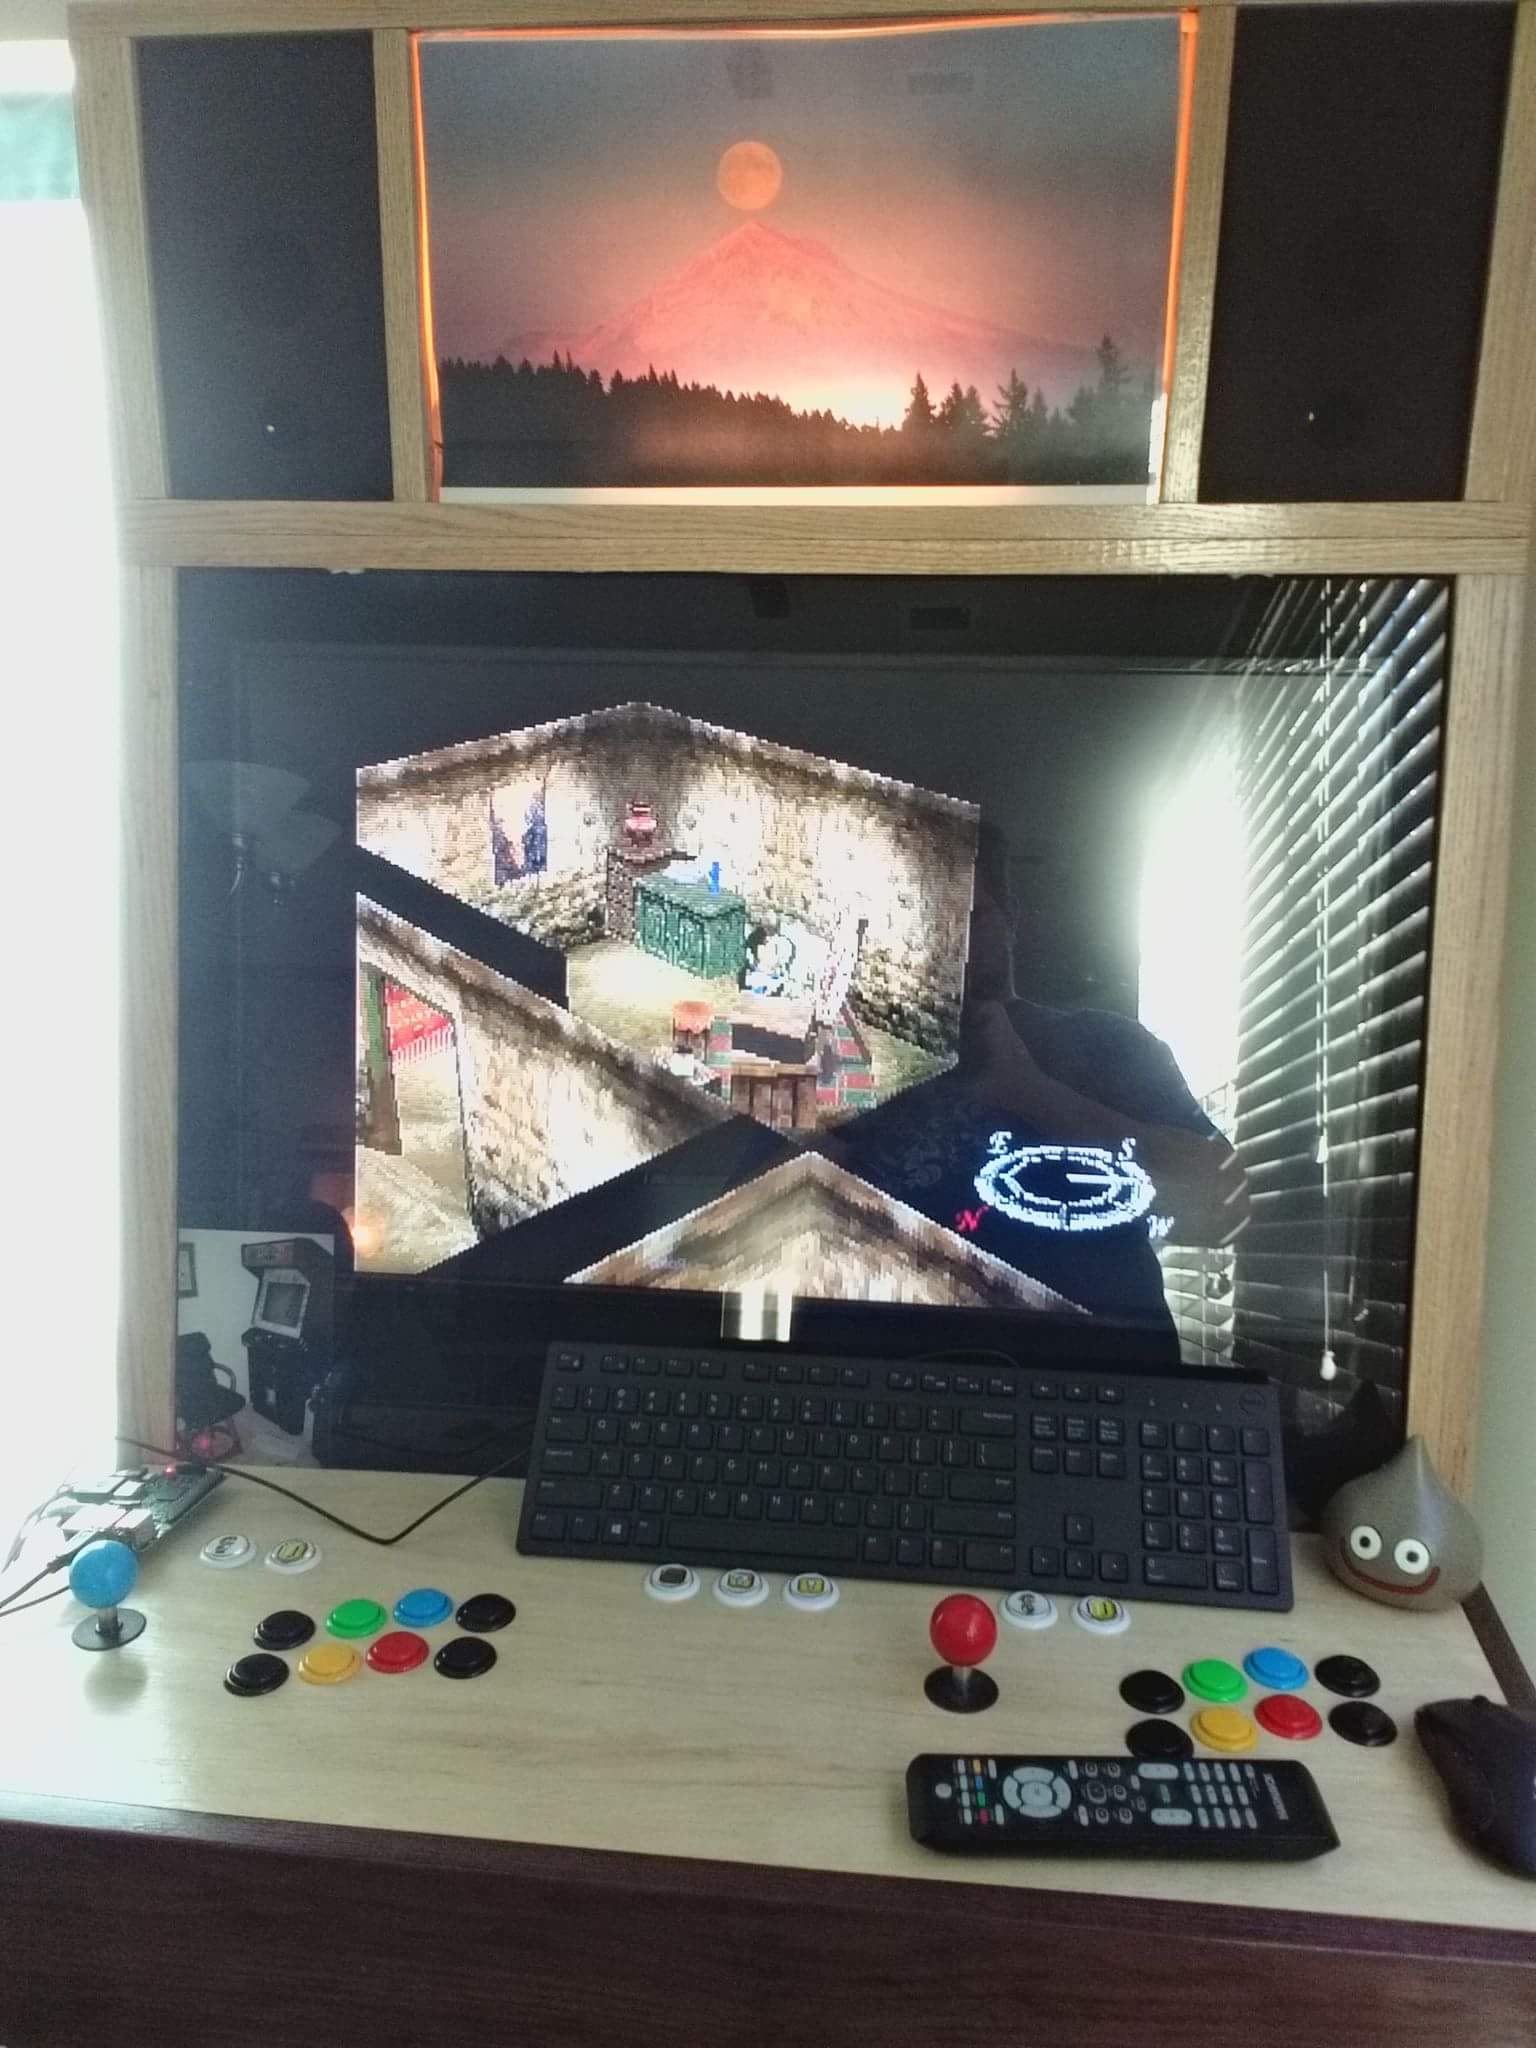
                  Details of the controls
                  0_1498842961804_14100404_1742313109376808_6297482302385639138_n.jpg

                  Details of the wiring
                  0_1498842992763_16487628_1821481784793273_1166657685783540985_o.jpg

                  voljega 1 Reply Last reply Reply Quote 0
                  • voljega
                    voljega Banned @Kithera last edited by voljega

                    @Kithera very nice and clean ! I'm curious about your theme which one are you using ?

                    1 Reply Last reply Reply Quote 0
                    • Dragu
                      Dragu Banned last edited by

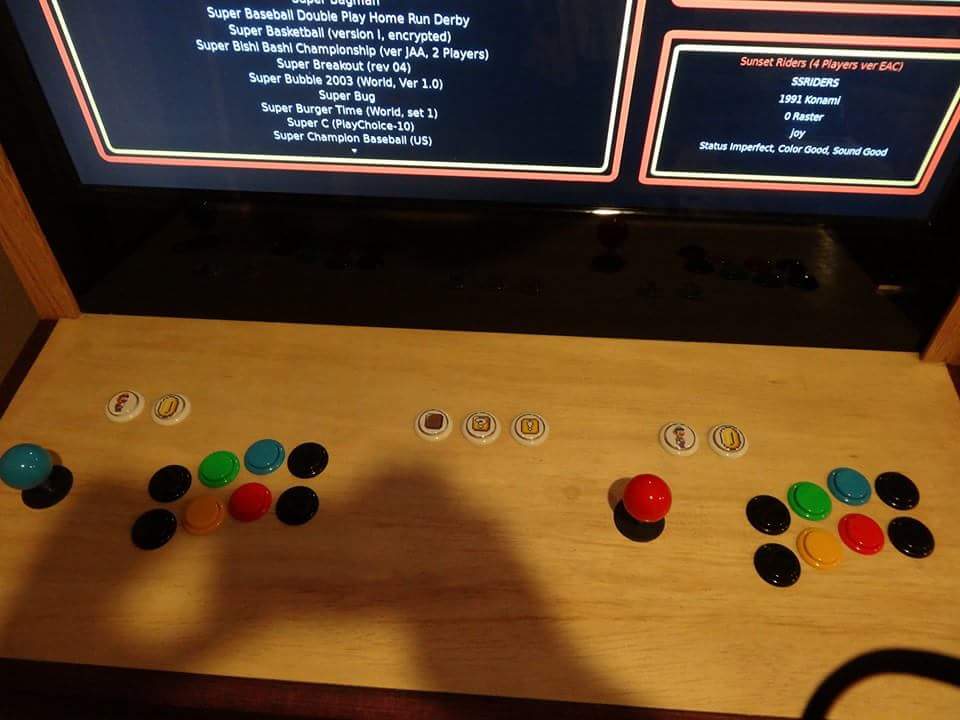
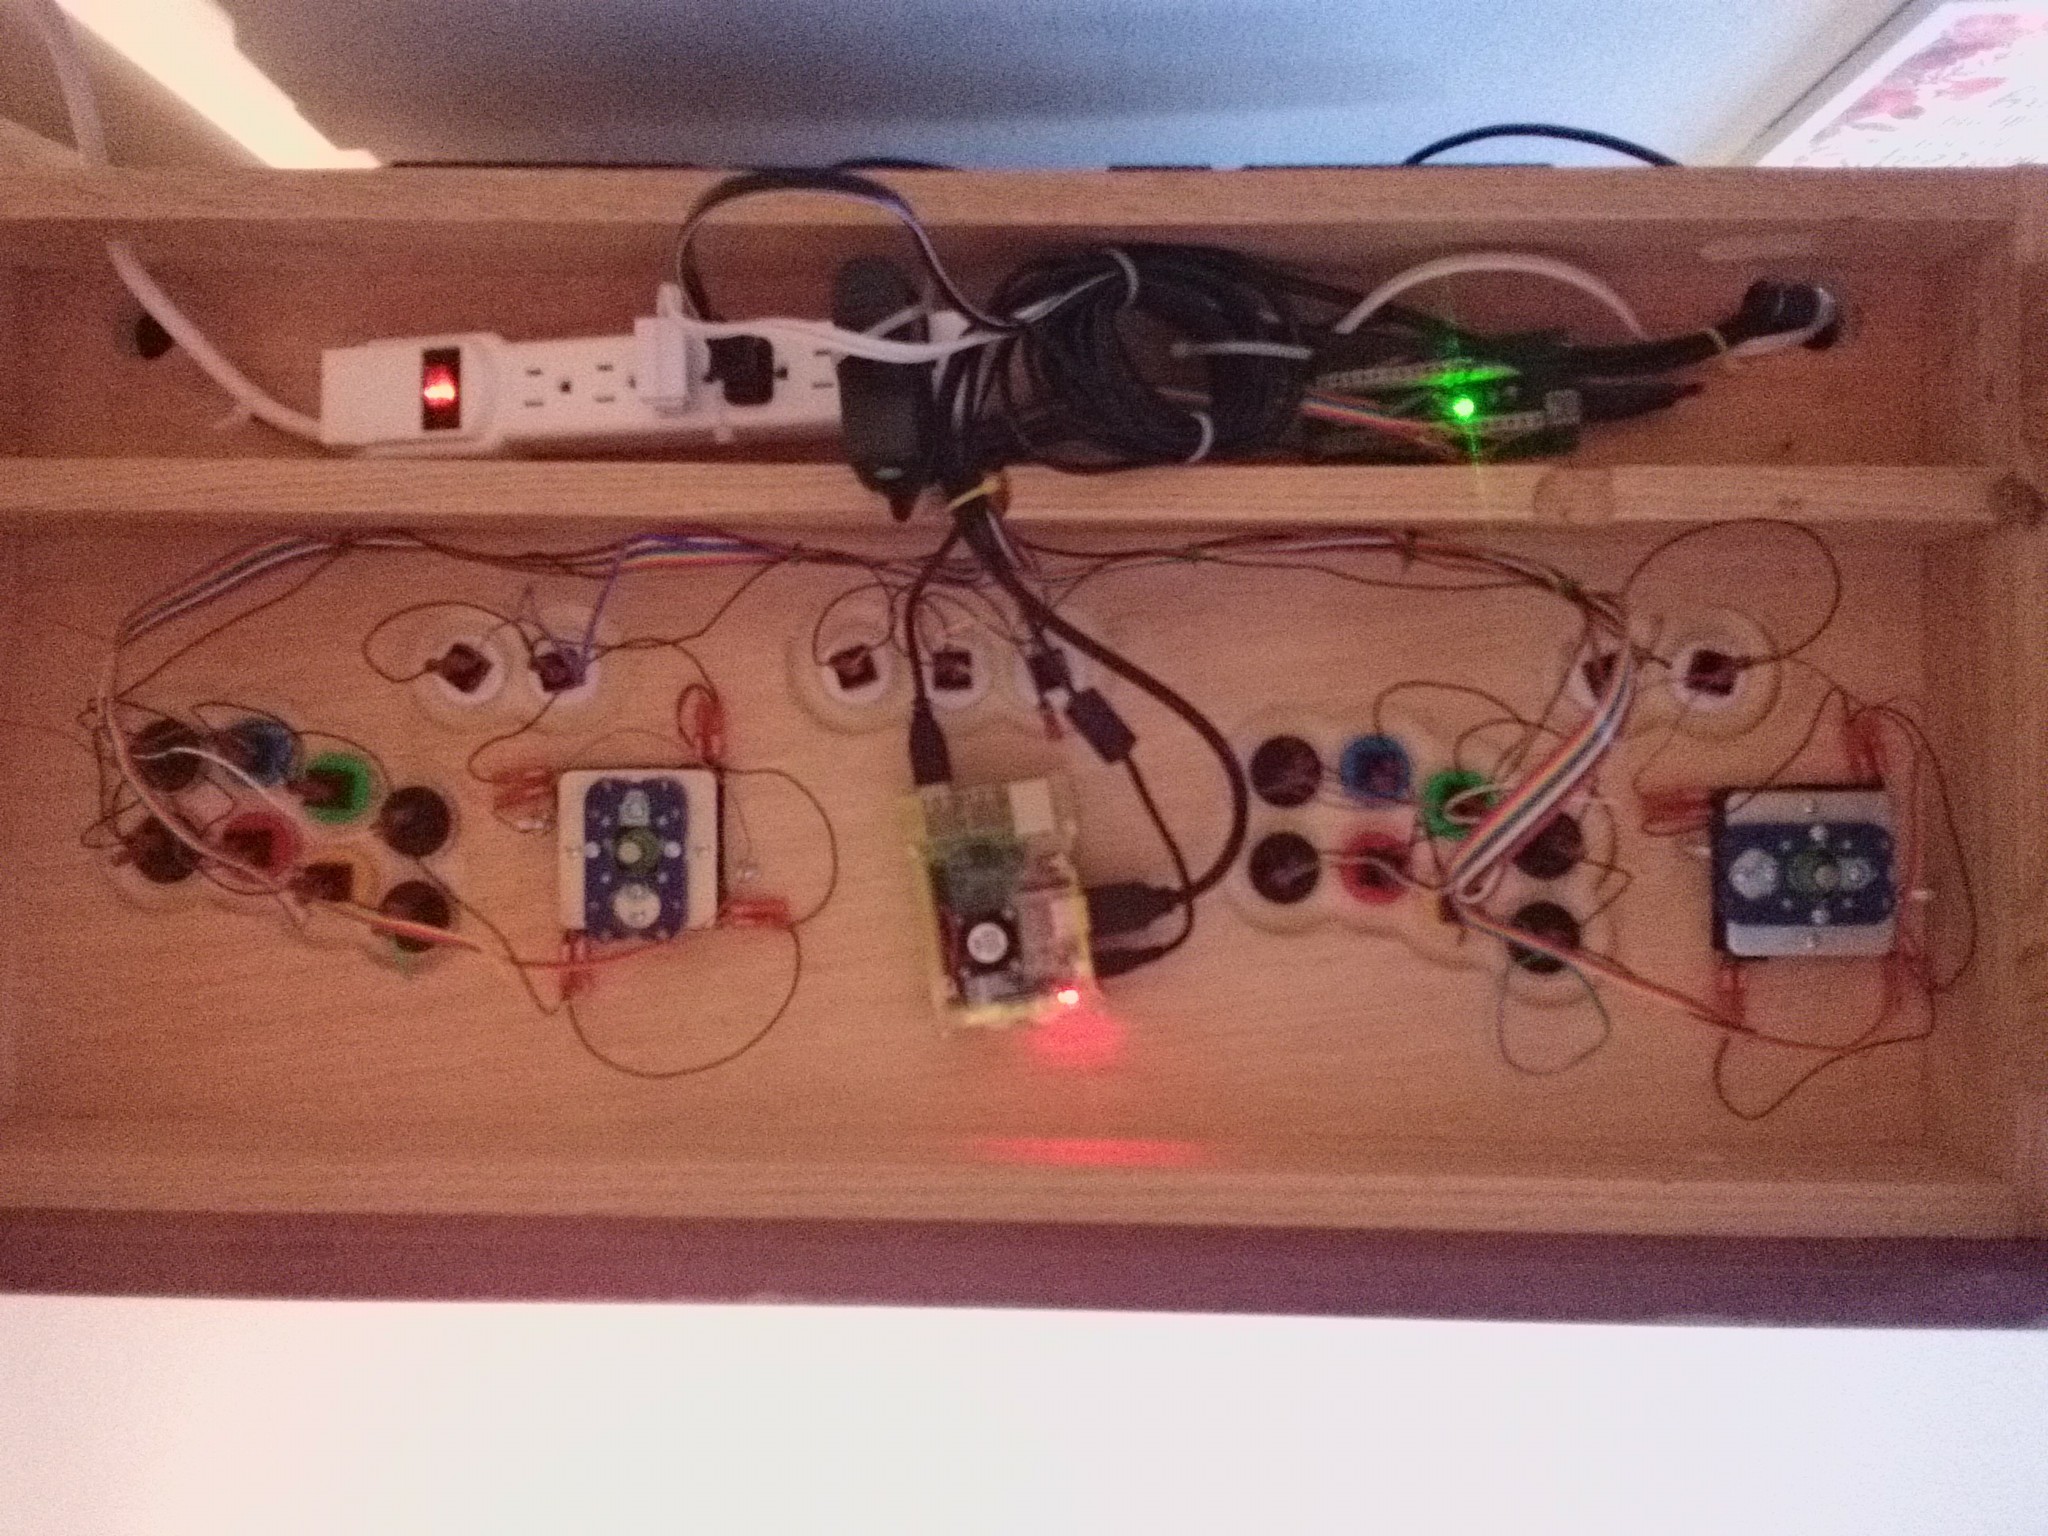
                      La mienne avec monnayeur sur le thème du dragon.
                      PI 3, écran 19" 4:3, DAC, SSD Intenso 256GB. Fond amovible pour meilleur accès et petite porte à l'arrière.
                      Derrière la porte il y a un tableau avec bouton reset, USB libre, switch pour sélection monnayeur ou "jeux gratuits", et switch pour les illuminations.
                      Les 8 boutons latéraux sont juste pour commander les interfaces. Réalisé pendant l'hiver passé.

                      alt text

                      alt text

                      cotedeporc 1 Reply Last reply Reply Quote 0
                      • cotedeporc
                        cotedeporc @Dragu last edited by

                        @dragu
                        Magnifique!

                        Pourrais-t-on avoir plus de détail sur les boutons latéraux et sur les nombreux PCB qui trainent ça et là dans ton bartop?

                        Merci d'avance!

                        Thème FoolScreen / Squared

                        1 Reply Last reply Reply Quote 0
                        • Dragu
                          Dragu Banned last edited by

                          Volontiers, je vaisessayer d'être court. J'utilise deux encodeurs USB "Zero Delay" ou Dragonrise chinois, et en tout 27 buttons illuminés.
                          Les 2x4 latéraux à l'écran sont juste touches de fonctions pour les encodeurs. J'ai eu la chance de trouver ces 16mm chi...., et que la couleur était compatible avec les boutons du tableau. 12V Led, que j'alimente en 5V à cause du champs de vision sur l'écran.
                          Ces touches, Turbo, Auto sont surtout pour le mode de tir en automatique si tu les presse en même temps qu'une autre touche, juste pour celle là, et Clr pour annuler.
                          Les Led des 2x6 touches du clavier sont alimentés par les encodeurs et s'éteignent donc si le PI est down. Les autres sont alimentés directement.
                          J'ai choisi des Sanwa/Seimitsu style parce que avec les microswitch genre clavier intègrés, ils sont beaucoup plus rapide que les Happ et Donkey Kong ne se fait plus mordre la queue par les pieuvres.
                          Les boutons frontals et latèraux sont des bricolages. D'abord sur les cotés il y a L2 et R2 pour P1 (flipper, etc) Après vers l'intérieur, 2x Hotkey, 2x Player et Select combiné.
                          J'ai pris des boutons Happ transparents et noirs et j'ai combiné, pour Hotkeys, L2, R2 extérieur transparent et noir central. J'ai monté des Led RGB arc en ciel qui changent lentement de couleur.
                          Pour les P1 et P2, et Select, j'ai fait l'inverse, extérieur noir et bouton transparent. Les Led blanches P1 et P2 sont alimentés par un attiny (programme disponible) et font du Fading lent un contre l'autre. La cpu est sur une des petites platines qui en général servent juste de point de connexion. Dans la touche Select est une Led rouge, qui est s'éteint si elle est remplacé par le monnayeur.
                          Meilleur moment pour utiliser le monnayeur, quand les gosses ont recus leur argent de poche, je rigole.....
                          Monnayeur et la touche Select activent un relais commandant les deux encodeurs (on ne paye pas en double)
                          Le monnayeur a aussi été modifié pour sortir les pièces par l'arrière au lieu vers le bas, en bartop la place est limitée.
                          Toute les descriptions du project se trouvent malheureusement juste en language Chleuhs. Mais si quelqu'un a une question, je vais sur repondre.
                          https://www.antik-automaten.de/wbb2/thread.php?threadid=2206
                          https://www.antik-automaten.de/wbb2/thread.php?threadid=2202

                          1 Reply Last reply Reply Quote 0
                          • RetroWilly
                            RetroWilly last edited by RetroWilly

                            So, i decided to try out the new RetroFlag Nespi case, and i was pretty surprised by the great quality of the case!

                            Got it early and while it was cheap, and they became pretty hard to buy these days., So i'll let the images do the talking to give you guys an idea about it. 🙂

                            alt text

                            alt text

                            alt text

                            alt text

                            alt text

                            Also put a fan in it, and some extra big heatsinks, and temps won't go higher than 45 Celsius. And i put a 64GB nano usb stick in it for my roms, saves, and other data. MicroSD is easy to reach, but it gives my NesPi sort of internal memory.

                            In short terms, i'm pretty happy with this little case. And they did a great job replicating a Nes Classic without the loss of the feel of quality. Only down point is the placement of the ethernet on the frontside, under the lid. Who thought of that..

                            Hello :)

                            1 Reply Last reply Reply Quote 1
                            • Alby21 Albert
                              Alby21 Albert last edited by

                              0_1524522761534_IMG_20180424_000331.jpg 0_1524522842400_IMG_20180424_000409.jpg
                              link text
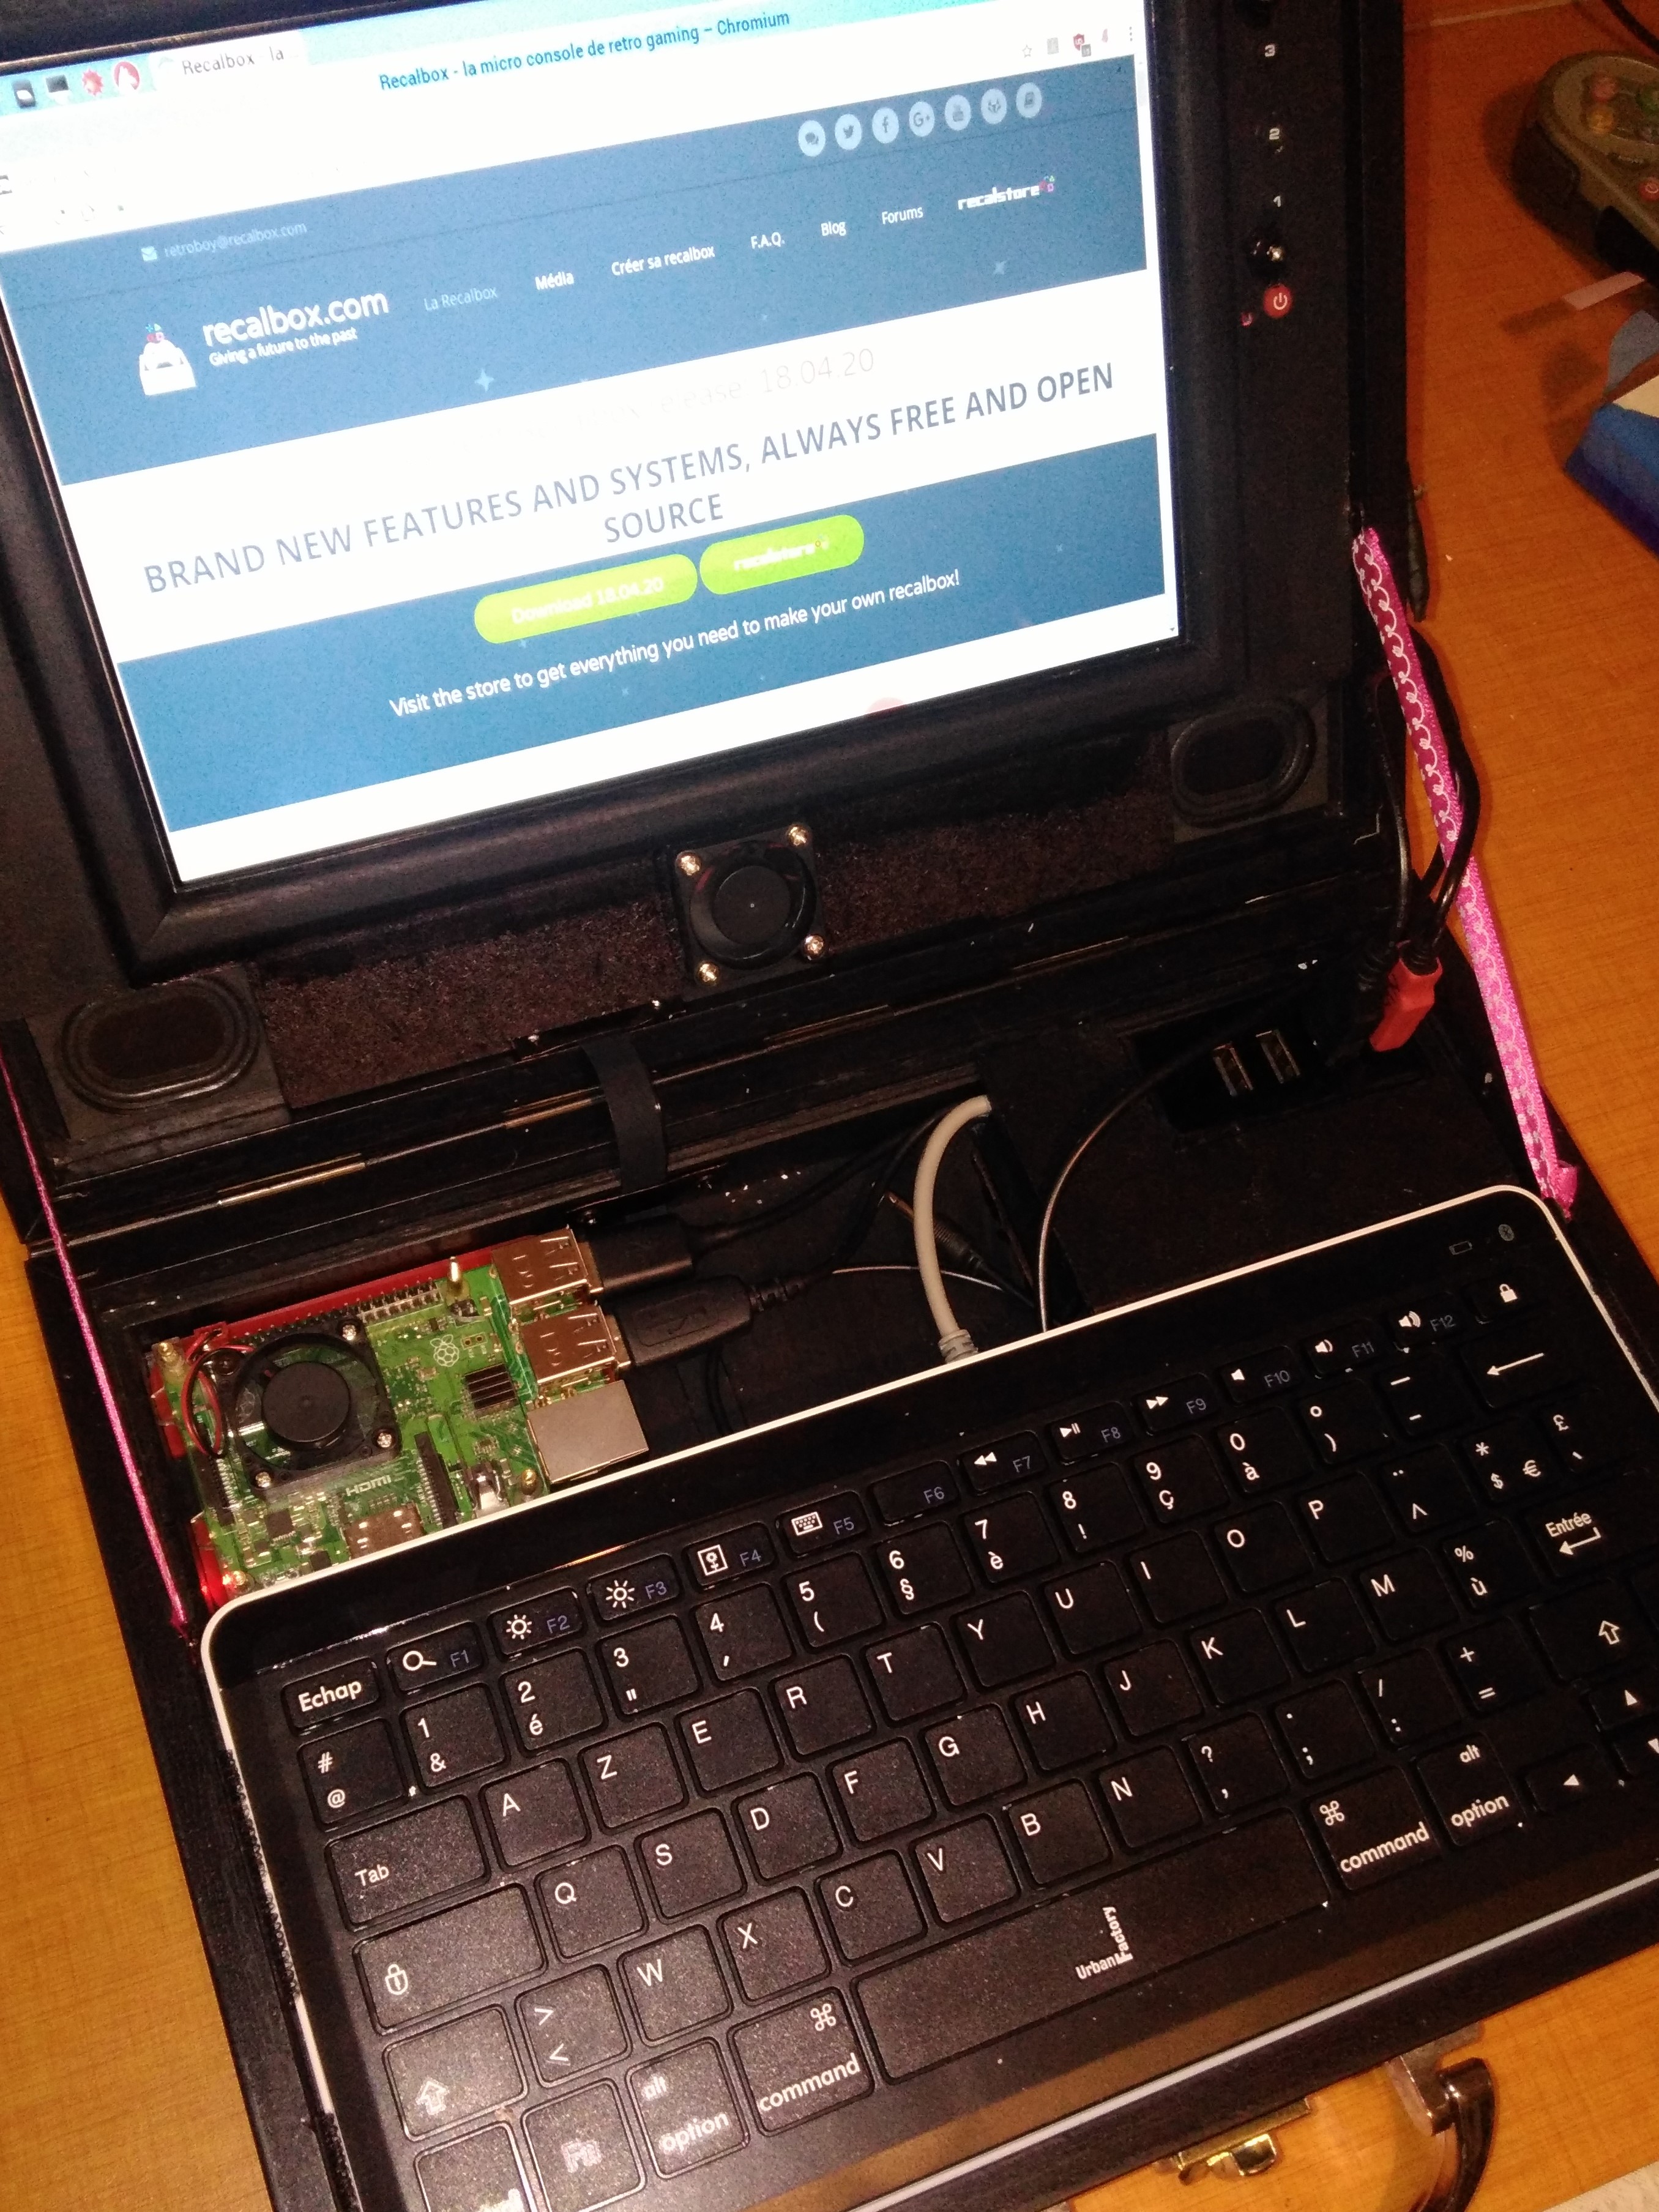
                              j'attend la nouvelle version recalbox pour le PI3 B+.....en attendant je me suis fait la "malle"....... 🙂

                              1 Reply Last reply Reply Quote 1
                              • Phonics
                                Phonics last edited by Phonics

                                This post is deleted!
                                1 Reply Last reply Reply Quote 0
                                • Rapa
                                  Rapa last edited by

                                  Hi

                                  I would like to share with you my Arcade Cabinet.

                                  The Project is still in progress.

                                  i will make the Stickers and the glass in he next few weeks.

                                  0_1526976542606_20180521_123638.jpg

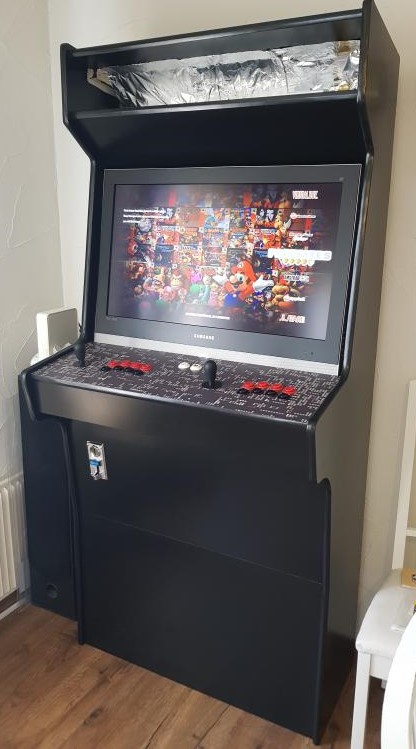
                                  if you have good ideas for the design, please let me know 😉

                                  Substring 1 Reply Last reply Reply Quote 1
                                  • Substring
                                    Substring @Rapa last edited by

                                    @rapa Very nice ! The players hardly have any chance to disturb the other player with their elbow during a VS game hahaha

                                    Former dev - Please reply with @substring so that i am notified when you answer me
                                    Ex dev - Merci de me répondre en utilisant @substring pour que je sois notifé

                                    Rapa noktambule 2 Replies Last reply Reply Quote 0
                                    • Rapa
                                      Rapa @Substring last edited by

                                      @substring Yes exactly. I wanted enough space to gamble longer

                                      1 Reply Last reply Reply Quote 0
                                      • noktambule
                                        noktambule @Substring last edited by

                                        @substring that's the problem. If I can't disturb the player 2, I have no chance to win! 😉

                                        Raspberry pi 2; recalbox 6.1 ; carte SD SanDisk 32go; alimentation 2a; jeux sur disque dur externe auto alimenté; manette dualshock 3 officielle + clone chinois driver bluez ; branché en hdmi.
                                        Ordinateur: Ubuntu Mate 18.04 LTS

                                        1 Reply Last reply Reply Quote 1
                                        • Kaoru_Requiem
                                          Kaoru_Requiem last edited by

                                          Il y a de sacrées belles réalisations par ici, ça fait plaisir à voir !

                                          Voici ma borne Sonic & Knuckles faite maison (que j'avais déjà posté dans mon topic de présentation).
                                          J'ai quelques idées d'évolution mais j'en parlerai une autre fois (si j'ai le temps et le courage de les faire).

                                          0_1509024379454_IMG_1632.JPG

                                          0_1509024397704_IMG_1634.jpg

                                          0_1527083805315_IMG_20180319_130244_2.JPG

                                          Un overlay perso pour rester dans le thème

                                          0_1527084040758_IMG_20180325_190256_1.JPG

                                          Et un petit Street Fighter V via moonlight !
                                          0_1527084182734_IMG_1648.JPG

                                          Ma borne Sonic & Knuckles

                                          Substring 1 Reply Last reply Reply Quote 2
                                          • Substring
                                            Substring @Kaoru_Requiem last edited by

                                            @kaoru_requiem SF5 par moonlight ? en 720p ? Ethernet ?

                                            Former dev - Please reply with @substring so that i am notified when you answer me
                                            Ex dev - Merci de me répondre en utilisant @substring pour que je sois notifé

                                            Kaoru_Requiem 1 Reply Last reply Reply Quote 0
                                            • First post
                                              Last post

                                            Want to support us ?

                                            72
                                            Online

                                            99.6k
                                            Users

                                            28.1k
                                            Topics

                                            187.1k
                                            Posts

                                            Copyright © 2021 recalbox.com