Recalbox 7.1.1 sur CRT / PVM
-
Allo à tous,
J'ai une question sur l'option de passer le signal de Recalbox 7.1.1 en 480p/240p via Pié-3-4 ou via la version X64 PC
Je suis parti de ce tuto https://recalbox.gitbook.io/documentation/tutorials/video/crt/connecting-your-recalbox-to-a-crt-monitor-using-hdmi
J'ai acheté le convertisseur HDMI > VGA et le cable VGA > BNC (Signal RGB)
j'ai un PVM sony 14L2 https://sonypvm.fandom.com/wiki/L2_Series
- j'ai un pi 2 avec recalbox 7.1., que j'ai réussi (75%) grace au tuto et des essais / erreurs à configurer pour que le thème natif passe en 480p et les émulateurs en 240p (ou valeur par défaut), mais c'est pas parfait et pas sûr que çà passe tout le temps à 60fps.
Si cela marche correctement, j'envisage de passer sous PI4 avec le même config.txt une fois l'image recalbox 7.1 pour Pi4 dessus la SD
- J'ai aussi un vieux PC dual core 2.5Gh, 4Gb DDR2 avec une geforce 760gt qui marche, du coup j'ai installé recalbox x64, et testé sur un LCD 1080p, une fois les "bon" bios à jour et les ROMS, çà a l'air de marcher pas mal et permet de faire tourner plus fluidement certains émulateurs
J'aimerais plug le PC via recalbox x64 sur le CRT (PVM) avec les même cables qui marchent sur le PI avec le tuto plus haut. Sauf que çà marche pas

J'ai des doublons d'image, çà bouge pas mal sur le thème (balayage horizontal + vibrations) et aucun jeux ne se lance en 240p ou résolution native, çà fait un brouillard blanc / noir.
Mais le son marche nickel (c'est déjà çà...)
j'ai passé des heures à chercher une solution pour le Pi2 ou pour le PC, le Pi2 est fixé à 75%, le PC x64 à 1%, d'où mon besoin d'une aide de votre part
Une fois que le PC marcheras, je pourrais comparer la qualité avec le Pi2 ou Pi4), et choisir soit de rester sur PC en optimisant le stockage (en passant par un cable USB to SATA il est possible d'installer l'image de Recalbox comme sur une clef USB et d'avoir plus de rapidité et de stockage qu'une cléf USB)
Je peux fournir des photos / vidéos de la version Pi2 ou PC x64 au besoin, et je peux link mon config.txt des 2 versions
Ultimement, dans un futur (lointain?) j'aimerais l'intégration d'un thème 480p/240p dans Recalbox avec l'option de switch les emulateurs dans leurs résolutions natives pour jouer dans ces résolutions sans avoir à galérer à tout config
Merci d'avance
-
@Antarnis pour Pi 3/4 ça devrait aller car il peut faire sortir de faible résolution, par contre pour le PC, d'après ce que je sais, tout dépendra de la carte graphique. Si tu veux des basses résolutions il faudra un mode 15Khz qu'une carte ATI peut faire, mais il faut encore intégrer le patch je crois , je ne sais pas si c'est ok sur les drivers intégrés. https://github.com/D0023R/linux_kernel_15khz
help @strodown PC Master
")
-
Allo @ian57 merci pour ta réponse
La CG que j'ai dans mon petit PC est une Nvidia, ce qui explique tout du coup
Il me reste l'option de jouer depuis le PC sur écran LCD alors
Pour mon Pi2 comme précisé, j'ai "presque" la bonne config, il me manque peu de choses, du coup je copie/colle le config.txt, si jamais tu vois un truc louche n'hésite pas à le corriger
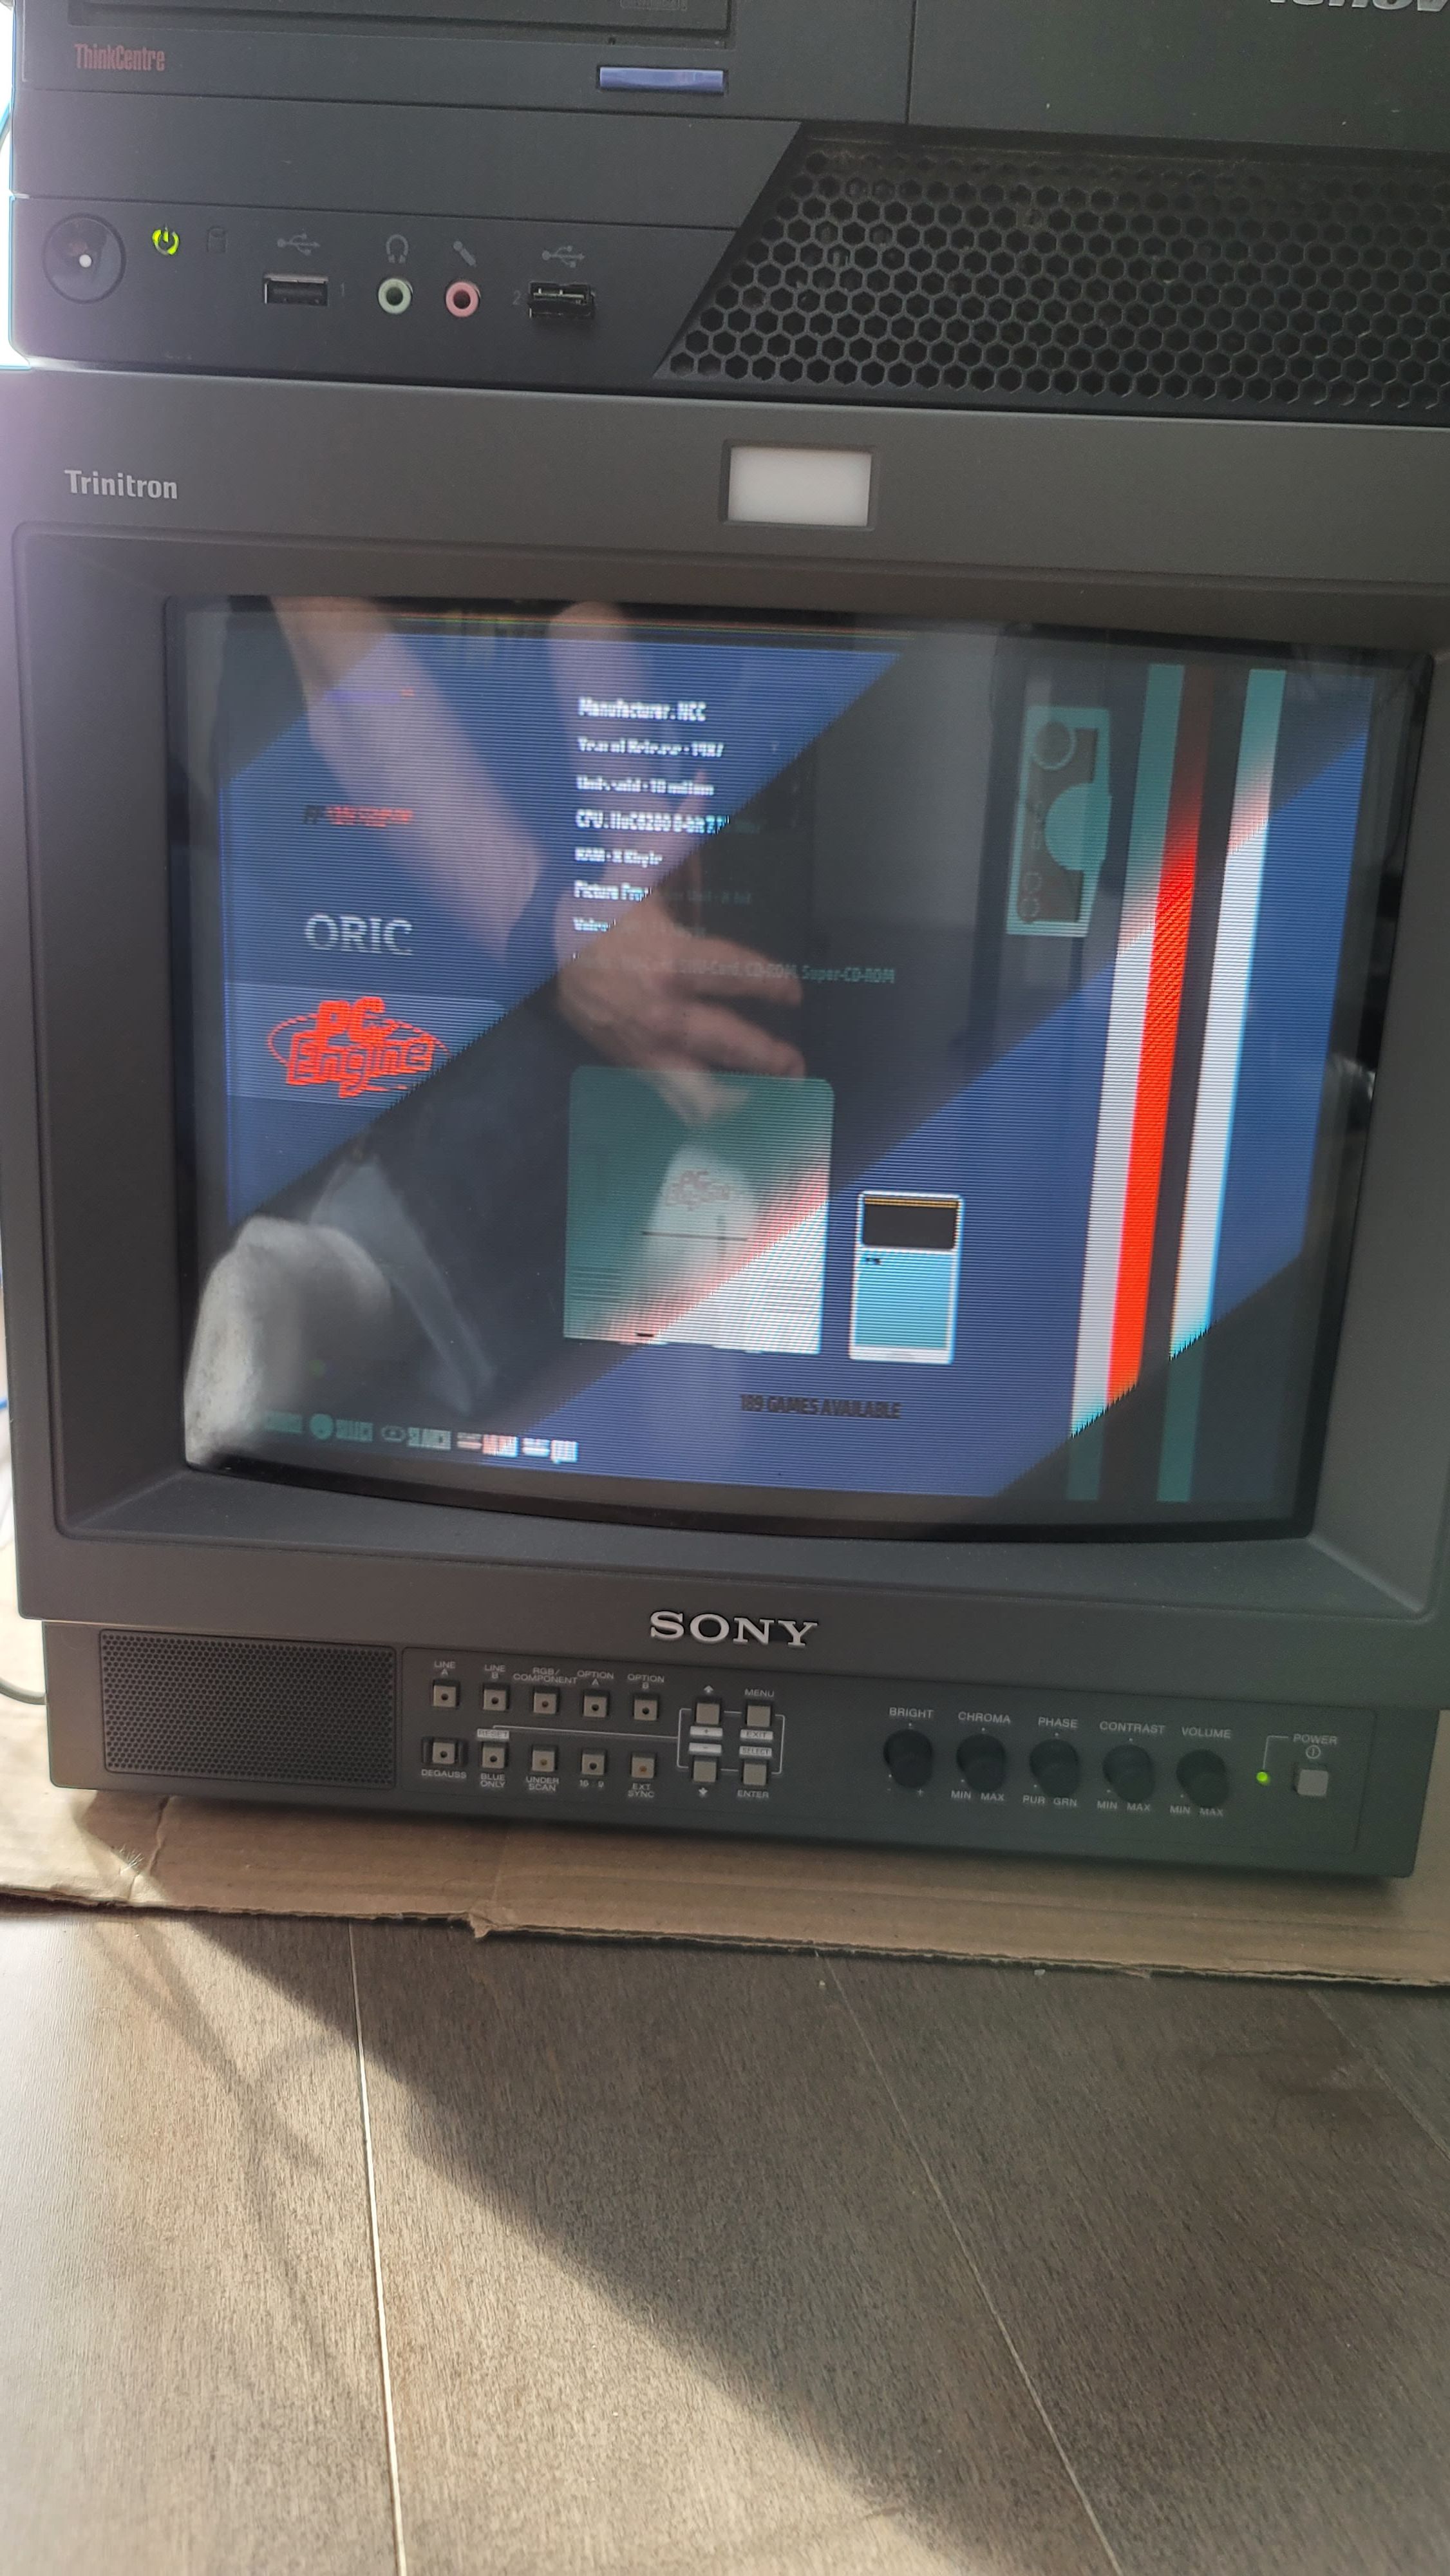
Photo de l'écran dans le menu, avec mode Under Scan activé, si je le désactive, l'image "sort" de l'écran. L'écran m'indique 480p / 60
Merci d'avance
# System Variable # You can configure your recalbox from here # To set a variable, remove the first ; on the line # ------------ A - System Options ----------- # # Uncomment the system.power.switch you use ;system.power.switch=ATX_RASPI_R2_6 # http://lowpowerlab.com/atxraspi/#installation ;system.power.switch=MAUSBERRY # http://mausberry-circuits.myshopify.com/pages/setup ;system.power.switch=REMOTEPIBOARD_2003 # http://www.msldigital.com/pages/support-for-remotepi-board-2013 ;system.power.switch=REMOTEPIBOARD_2005 # http://www.msldigital.com/pages/support-for-remotepi-board-plus-2015 ;system.power.switch=WITTYPI # http://www.uugear.com/witty-pi-realtime-clock-power-management-for-raspberry-pi ;system.power.switch=PIN56ONOFF # https://github.com/recalbox/recalbox-os/wiki/Add-a-start-stop-button-to-your-recalbox-(EN) ;system.power.switch=PIN56PUSH # https://github.com/recalbox/recalbox-os/wiki/Add-a-start-stop-button-to-your-recalbox-(EN) ;system.power.switch=PIN356ONOFFRESET # https://github.com/recalbox/recalbox-os/wiki/Add-a-start-stop-button-to-your-recalbox-(EN) ;system.power.switch=PIN356PUSHRESET # https://github.com/recalbox/recalbox-os/wiki/Add-a-start-stop-button-to-your-recalbox-(EN) ## fbcp FrameBuffer Copy Program ## For small TFT screen on GPIO and SPI ## See https://github.com/recalbox/recalbox-os/wiki/Utility---Use-of-fbcp-for-small-TFT-screen-%28EN%29 for details ## Needed for Waveshare 3.2" 3.5" TFT screen, 2.8" Adafruit screen ## See https://github.com/recalbox/recalbox-os/wiki/TFT-Screen-SPI-Bus-%28EN%29 ## for support and configuration details needed by /boot/config.txt system.fbcp.enabled=0 ## Splash screen duration ## 0 : Video will be stopped when emulationstation is ready to start. ## -1 : All the video will be played before emulationstation start (default) ## >0 : Time the video will be played before emulationstation start (in seconds) system.splash.length=-1 ## Splash videos selection ## all: select a boot video in recalbox videos and user videos ## recalbox: select a boot video only in recalbox videos ## custom: select a boot video only in user videos ## Any invalid value means "all" system.splash.select=all ## Recalbox Manager (http manager) system.manager.enabled=1 ## Currently, only version 2 is available system.manager.version=2 ## Recalbox security # enforce security # samba password required # disable virtual gamepads system.security.enabled=0 ## Recalbox API (REST) system.api.enabled=0 ## Allow a specific resolution for ES only from the command : tvservice -m [MODE] ## Leave commented for the default usual behaviour ;system.es.videomode=CEA 4 HDMI ## EmulationStation ### menu style ### default -> default all options menu ### none -> no menu except the game search menu ### bartop -> less menu, only needed for bartops emulationstation.menu=default ### Select a system to show on boot (use rom directory name) (string) emulationstation.selectedsystem=favorites ### Show the gamelist of the first or selected system on boot (0,1) emulationstation.bootongamelist=0 ### Disable system view. ES will boot and show ONLY the first or selected system (0,1) emulationstation.hidesystemview=0 ### Pa**e Gamelists only. Show only games listed in gamelist.xml files (0,1) emulationstation.gamelistonly=0 ### Force basicgameList view to be displayed, even if your game systems are scraped (0,1) emulationstation.forcebasicgamelistview=0 ### Filter out adult games ### you may use emulationstation.snes.filteradultgames=1 ### to filter out adult games for the snes system or any other system emulationstation.filteradultgames=0 ### Zipped gamelist preference ### Whatever you choose, emulationstation can read both compressed ### and uncompressed gamelist.xml or gamelist.zip ### However updated gamelist will be saved in your prefered format. ### Zipped format may save load time, especially on slow devices. ### 0 = gamelist.xml ### 1 = gamelist.zip ;emulationstation.zippedgamelist=1 ## Arcade metasystem ## Activate the Arcade metasystem to group all games from piFBA, FBN (libretro), MAME and optionally Neogeo ## into a single "Arcade" system. ;emulationstation.arcade=1 ## You may want to specify its position in the system list. (Default: 0) ## Negatives values may be used to tart from the end (-1 = last position) ;emulationstation.arcade.position=0 ## Include NeoGeo or not (default: 1) ;emulationstation.arcade.includeneogeo=1 ## Hide included system or leave them in the system list (default: 1) ;emulationstation.arcade.hideoriginals=1 ## Virtual systems ### Activate a virtual system with all games available from all systems ;emulationstation.collection.allgames=1 ### Activate a virtual system with all multiplayer games (players >= 2) ;emulationstation.collection.multiplayers=1 ### Activate a virtual system with last played games ;emulationstation.collection.lastplayed=1 ## Videosnaps ### Delay before videosnaps start, in millisecond. Default: 2s ;emulationstation.videosnaps.delay=2000 ### Video loop times. 0 = no video. 1 or more = the video loops x times before fading out ;emulationstation.videosnaps.loop=1 ### Enable videosnap sound/music ;emulationstation.videosnaps.sound=1 ## Scrapers ### Activate this option to extract region from filename when possible scraper.extractregionfromfilename=1 ### Select the source of game's names ### 0 = from scrapper result (default) ### 1 = from filename ### 2 = from filename undecorated (i.e: (text) and [text] removed) scraper.getnamefrom=0 ### ScreenScraper.fr ### Force media region - if not defined, region is taken from system.language. Default: us scraper.screenscraper.region=jp ### Force text language - if not defined, region is taken from system.language. Default: en scraper.screenscraper.language=en ### Choose the media to download among: ### screenshot: game screenshot ### title : game title screenshot ### box2d : Front case ### box3d : 3D rendered case ### mixv1 : Recalbox special mix image V1 (default) ### mixv2 : Recalbox special mix image V2 scraper.screenscraper.media=mixv1 ### ScreenScraper account ;scraper.screenscraper.user= ;scraper.screenscraper.password= ## Emulator special keys ## default -> default all special keys ## nomenu -> cannot popup the emulator menu ## none -> no special keys in emulators system.emulators.specialkeys=default ## Show or hide kodi in emulationstation (0,1) kodi.enabled=0 ## Start kodi at launch (0,1) kodi.atstartup=0 ## set x button shortcut (0,1) kodi.xbutton=0 ## Allow a specific resolution for Kodi only from the command : tvservice -m [MODE] ## By default is using the default resolution of your screen kodi.videomode=default ## Kodi can wait for a network component before starting ## waithost is the ip or hostname that must answer to a ping to validate the availability ## waittime is the maximum time waited when kodi boots ## if waitmode is required, kodi will not start if the component is not available ## if waitmode is wish, kodi will start if the component is not available ## if waitmode is not set or has another value, kodi will start immediately ;kodi.network.waitmode=required ;kodi.network.waittime=10 ;kodi.network.waithost=192.168.0.50 ## Hyperion ## Hyperion allows you to use an ambilight like led system on your recalbox ## Use hypercon to create your configuration file, and copy it in /recalbox/share/system/configs/hyperion/hyperion.config.json hyperion.enabled=0 # ------------ B - Network ------------ # ## Set system hostname system.hostname=RECALBOX ## Activate wifi (0,1) wifi.enabled=0 ## Set wifi region ## More info here: https://github.com/recalbox/recalbox-os/wiki/Wifi-country-code-(EN) wifi.region=JP ## Wifi SSID (string) ;wifi.ssid=new ssid ## Wifi KEY (string) ## after rebooting the recalbox, the "new key" is replace by a hidden value "enc:xxxxx" ## you can edit the "enc:xxxxx" value to replace by a clear value, it will be updated again at the following reboot ## Escape your special chars (# ; $) with a backslash : $ => \$ ;wifi.key=new key ## Wifi - static IP ## if you want a static IP address, you must set all 3 values (ip, gateway, and netmask) ## if any value is missing or all lines are commented out, it will fall back to the ## default of DHCP ;wifi.ip=manual ip address ;wifi.gateway=new gateway ;wifi.netmask=new netmask # secondary wifi (not configurable via the user interface) ;wifi2.ssid=new ssid ;wifi2.key=new key # third wifi (not configurable via the user interface) ;wifi3.ssid=new ssid ;wifi3.key=new key ## Samba share system.samba.enabled=1 ### Virtual Gamepads system.virtual-gamepads.enabled=1 ### SSH system.ssh.enabled=1 # ------------ C - Audio ------------ # ## Set the audio device (auto, hdmi, jack) audio.device=Default output ## Set system volume (0..100) audio.volume=90 ## Enable or disable system sounds in ES (0,1) audio.bgmusic=1 # -------------- D - Controllers ----------------- # # Enable support for standard bluetooth controllers controllers.bluetooth.enabled=1 # Enable ERTM controllers.bluetooth.ertm=1 ## Please enable only one of these # -------------- D1 - PS3 Controllers ------------ # ##Enable PS3 controllers support controllers.ps3.enabled=1 ## Choose a driver between bluez, official and shanwan ## bluez -> bluez 5 + kernel drivers, support official and shanwan sisaxis ## official -> sixad drivers, support official and gasia sisaxis ## shanwan -> shanwan drivers, support official and shanwan sisaxis controllers.ps3.driver=bluez # ------------ D2 - GPIO Controllers ------------ # ## GPIO Controllers ## enable controllers on GPIO with mk_arcarde_joystick_rpi (0,1) controllers.gpio.enabled=0 ## mk_gpio arguments, map=1 for one controller, map=1,2 for 2 (map=1,map=1,2) controllers.gpio.args=map=1,2 ## Custom mk_gpio arguments, ## controllers.gpio.args=map=5 gpio=Y-,Y+,X-,X+,start,select,a,b,tr,y,x,tl,hk for one controller, ## controllers.gpio.args=map=5 gpio=pin1,pin2,pin3,.....,pin12,pin13 ## controllers.gpio.args=map=5,6 gpio=Y-,Y+,X-,X+,start,select,a,b,tr,y,x,tl,hk gpio2=Y-,Y+,X-,X+,start,select,a,b,tr,y,x,tl,hk for 2 (map=5,map=5,6) ## controllers.gpio.args=map=5,6 gpio=gpiox,gpioy,gpioz,.....,gpiou,gpiov gpio2=gpiox,gpioy,gpioz,.....,gpiou,gpiov # where gpiox,gpioy,gpioz ... are NOT pin numbers on the connector, BUT location gpio numbered as in # https://www.raspberrypi-spy.co.uk/wp-content/uploads/2012/06/Raspberry-Pi-GPIO-Layout-Model-B-Plus-rotated-2700x900.png ## Set pin to -1 to disable it # controllers.gpio.args=map=5,6 gpio=4,17,27,22,10,9,25,24,23,18,15,14,2 gpio2=11,5,6,13,19,26,21,20,16,12,7,8,3 ## MCP configuration : GPIO and MCP can be used together. You can mix them. ## map=0x20,0x21 for 2 mcp23017 on i2c bus #controllers.gpio.args=map=0x20,0x21,5,6 gpio=4,17,27,22,10,9,25,24,23,18,15,14,-1 gpio2=11,5,6,13,19,26,21,20,16,12,7,8,-1 # ------------ D3 - Steam Controllers ------------ # ## Enable steam controller service controllers.steam.enabled=0 ## DB9 Controllers ## Enable DB9 drivers for atari, megadrive, amiga controllers (0,1) controllers.db9.enabled=0 ## db9 arguments controllers.db9.args=map=1 ## Gamecon controllers ## Enable gamecon controllers, for nes, snes, psx (0,1) controllers.gamecon.enabled=0 ## gamecon_args controllers.gamecon.args=map=1 ## XGaming's XArcade Tankstik and other compatible devices controllers.xarcade.enabled=1 # ------------ E - Language and keyboard ------------ # ## Set the language of the system (fr_FR,en_US,en_GB,de_DE,pt_BR,es_ES,it_IT,eu_ES,tr_TR,zh_CN) system.language=en_US ## set the keyboard layout (fr,en,de,us,es) ;system.kblayout=us ## Set you local time ## Select your timezone from : ls /usr/share/zoneinfo/ (string) ;system.timezone=Europe/Paris # ------------ F - UPDATES ------------ # ## Automatically check for updates at start (0,1) updates.enabled=1 # Update type : default to stable updates.type=stable # ------------ G - HERE IT IS - GLOBAL EMULATOR CONFIGURATION ------------ # ## The global value will be used for all emulators, except if the value ## is redefined in the emulator ## Set game resolution for emulators ## select your mode from the command : tvservice -m [MODE] ## CEA 5 HDMI : 1920x1080 @ 60Hz 16:9, clock:74MHz interlaced ## CEA 4 HDMI : 1280x720 @ 60Hz 16:9, clock:74MHz progressive ## use 'default' for using the default resolution ## use 'auto' : switches to CEA 4 HDMI if supported, else keep the current resolution ## (string) global.videomode=CEA 4 HDMI ## Shader set ## Automatically select shaders for all systems ## (none, retro, scanlines) global.shaderset=none ## Once enabled, your screen will be cropped, and you will have a pixel perfect image (0,1) global.integerscale=0 ## Set gpslp shader for all emulators (prefer shadersets above). Absolute path (string) global.shaders= ## Set ratio for all emulators (auto,4/3,16/9,16/10,custom) global.ratio=none ## Set smooth for all emulators (0,1) global.smooth=0 ## Set rewind for all emulators (0,1) global.rewind=1 ## Set autosave/load savestate for all emulators (0,1) global.autosave=0 ## Enable retroarchievements (0,1) ## Set your www.retroachievements.org username/password ## Escape your special chars (# ; $) with a backslash : $ => \$ global.retroachievements=0 global.retroachievements.hardcore=0 global.retroachievements.username= global.retroachievements.password= ## Set retroarch input driver (auto, udev, sdl2) ## If you don't have issues with your controllers, let auto global.inputdriver=auto ## If you do not want recalboxOS to generate the configuration for all emulators (string) ;global.configfile=/path/to/my/configfile.cfg ## Demo screensaver parameters ## Set the system list from which ES will run random games ## Empty list or unexisting key means all available systems global.demo.systemlist=3do,amigacd32,atari2600,atari5200,atari7800,daphne,fbneo,fds,gamegear,gba,lynx,mame,mastersystem,megadrive,neogeo,nes,ngpc,pcengine,sega32x,sg1000,snes ## Default demo game sessions last 90s. Change this value if you want shorter or longer sessions ;global.demo.duration=90 ## Default game info screen duration lasts 6s. Change this value if you want shorter or longer info screens. ;global.demo.infoscreenduration=6 ## Retroarch AI Translation service ## Comment out or set to 0 the following key if you don't want the AI service global.translate=1 ## Set the source and the target languages. ## Allowed language list: EN, ES, FR, IT, DE, JP, NL, CS, DA, SV, HR, KO, ZH_CN, ZH_TW, CA, BG, BN, EU, AZ, AR, SQ, ## AF, EO, ET, TL, FI, GL, KA, EL, GU, HT, IW, HI, HU, IS, ID, GA, KN, LA, LV, LT, MK, MS, ## MT, NO, FA, PL, PT, RO, RU, SR, SK, SL, SW, TA, TE, TH, TR, UK, UR, VI, CY, YI ## Setting the translate.from key to a specified language may speed up or give more accurate results ## If translate.to key is commented, the default value is extracted from system.language or, if system.language is ## undefined, set to auto (=EN). global.translate.from=auto global.translate.to=auto ## zTranslate API Key ## go to https://ztranslate.net and create an account. ## validate your account, then log in and go to the settngs page ## Look for the API Key at the bottom of the page, then uncomment the following key and paste your API Key: ;global.translate.apikey=RECALBOX ## Other translation service ## If you want to use another translation service or a custom API call, use this key to ## specify the url to call. If the key is not empty, it is used instead of zTranslation's API Key ;global.translate.url= # ------------ H - EMULATORS CHOICES ----------- # ## You can override the global configurations here ## Here is the snes example ;snes.videomode=CEA 4 HDMI snes.core=snes9x2010 ;snes.shaders=/recalbox/share/shaders/shaders_glsl/mysnesshader.gplsp ;snes.ratio=16/9 ;snes.smooth=0 ;snes.rewind=1 ;snes.autosave=0 ;snes.emulator=libretro ;snes.integerscale=0 ## If you do not want recalboxOS to generate the configuration for the emulator: ;snes.configfile=/path/to/my/configfile.cfg ## Default cores for RPi2 snes.core=snes9x2010 c64.core=x64 ## NeoGeo emulator ## You can use pifba or a libretro core (fba2x,libretro) neogeo.emulator=libretro ## If you set libretro as neogeo.emulator, the line below sets the retroarch core (fbneo, mame2000) neogeo.core=fbneo ## N64 emulator is configured to display a screen with a 640x480 resolution (native n64 resolution) ## So you must use one of these video modes (DMT 4 HDMI,CEA 1 HDMI). ## If your screen is not compatible with one of these video modes, please check the recalbox's wiki. n64.videomode=DMT 4 HDMI ## If you are using a CRT screen, please change the setting above with this one : # n64.videomode=default snes.videomode=default nes.videomode=default n64.videomode=default gba.videomode=default gb.videomode=default gbc.videomode=default fds.videomode=default gamecube.videomode=default wii.videomode=default virtualboy.videomode=default sg1000.videomode=default mastersystem.videomode=default megadrive.videomode=default gamegear.videomode=default sega32x.videomode=default segacd.videomode=default dreamcast.videomode=default neogeo.videomode=default mame.videomode=default fba.videomode=default fbneo.videomode=default ngp.videomode=default ngpc.videomode=default gw.videomode=default vectrex.videomode=default lynx.videomode=default lutro.videomode=default wswan.videomode=default wswanc.videomode=default pcengine.videomode=default pcenginecd.videomode=default supergrafx.videomode=default atari2600.videomode=default atari7800.videomode=default atarist.videomode=default apple2.videomode=default amstradcpc.videomode=default c64.videomode=default colecovision.videomode=default msx.videomode=default msx1.videomode=default msx2.videomode=default dos.videomode=default scummvm.videomode=default o2em.videomode=default zxspectrum.videomode=default zx81.videomode=default doom.videomode=default cavestory.videomode=default psx.videomode=default psp.videomode=default moonlight.videomode=default ## Demo screensaver parameters ## Include or exclude a particular system from the demo screensaver ## You may change the global.demo.systemlist key or include/exclude every single system ;snes.demo.include=0 ## Set the session duration for a particular system ;snes.demo.duration=90 # ------------ I - NETPLAY PARAMETERS ----------- # ## All these values are handled by Recalbox itself global.netplay=1 global.netplay.nickname= global.netplay.port=55435 global.netplay.relay= global.netplay.systems=fbneo,mame,mastersystem,megadrive,neogeo,nes,pcengine,sega32x,sg1000,snes,supergrafx,atari2600,pcenginecd,pcfx,fds,tic80,segacd,mrboom global.netplay.lobby=http://lobby.libretro.com/list/ # ------------ J - TFT SECONDARY SCREEN ----------- # #Second miniTFT screen as marquee to display scrapes and videos #Enable it with system.secondMiniTFT.enabled=1, disable with system.secondMiniTFT.enabled=0 #this configuration is REQUIRED system.secondminitft.enabled=0 #Type of mini TFT : OGST, unknown #for Support of XU4 OGSTCase mini screen, just configure it secondminitft.type=ogst #Most of spi tft screen are enabled thanks to overlays in /boot/config.txt #please check the specific configuration of your screen #Some examples are available on the page ..... # values are : # - overlay : screen configured through overlays in /boot/config.txt # - ogst : screen of the XU4 OGST case. Supported out of the box # - default : the rest of the world #this configuration is REQUIRED if system.secondminitft.enabled=1 ;system.secondminitft.type=overlay #Choose the resolution of your screen #miniTFT resolution 320x240 -> 240p, 480x320 -> 320p #this configuration is REQUIRED if system.secondminitft.enabled=1 ;system.secondminitft.resolution=240p #Scraped image aspect on tft screen : fbv display option # options available : stretch, ignore-aspect, enlarge. # stretch : Strech (using a simple resizing routine) the image to fit onto screen if necessary # alpha : use the alpha channel (if applicable) # ignore-aspect : Ignore the image aspect while resizing # enlarge : Enlarge the image to fit the whole screen if necessary # 1 = enabled, 0 = disabled #this configuration is REQUIRED if system.secondminitft.enabled=1 ;system.secondminitft.imagestretchenabled=1 ;system.secondminitft.imageenlargeenabled=0 ;system.secondminitft.imagealphaenabled=0 ;system.secondminitft.imageignoreaspectenabled=1 #When activating the second TFT screen, you may want to display #game scraped video only on the second screen. This variable #allows you to disable scraped video playing in ES during game browsing #system.secondminitft.disablevideoines=1 disable video playing in ES #system.secondminitft.disablevideoines=0 enable video playing in ES #this configuration is OPTIONAL if system.secondminitft.enabled=1 ;system.secondminitft.disablevideoines=1 #if the backlight of your your screen can be manage by PWM, #indicates the GPIO value of your PWM control #WiringPi and its gpio program will be used to control the backlight #when RB goes in SLEEP mode, and when it wakes up. #On raspberry pi, PWMs cannot be used simultaneously with Jack sound output. #If your are using HDMI or a Audio hat you can use backlight PWM control for the second screen #If you are using Jack output please leave commented. #The Screen will be switch down in Sleep mode, and switch on when it wakes up. #On OGST, only this mode is available. #this configuration is OPTIONAL if system.secondminitft.enabled=1 ;system.secondminitft.backlightcontrol=18 # system.secondminitft.usemarquee variabla allows you to display a different # image during running game. just creat a directory named "marquees" in media # aside videos and images and put new images with the same name as in images # example : # - /recalbox/share/roms/neogeo/media/marquees/alpham2.png # - /recalbox/share/roms/neogeo/media/images/alpham2.png # if set to 1, in game the marquee images will be displayed # if set to 0, in game the scraped images will be displayed ;system.secondminitft.usemarquee=0 #system.secondminitft.sleepenabled allows you to enable/disable #sleep mode for the second TFT. If set to 1 sleep mode is enabled and #backlight of the screen will be OFF. If set to 0, sleep mode is #disabled and the backlight of the screen will be always On ;system.secondminitft.sleepenabled=0 ## Configurations generated by Recalbox emulationstation.theme.recalbox-next.colorset=1-light blue colors emulationstation.theme.recalbox-next.gamelistview=1-standard gamelist emulationstation.theme.recalbox-next.region=jp emulationstation.theme.recalbox-next.iconset=1-standard icons emulationstation.theme.recalbox-next.menuset=1-light blue icons emulationstation.theme.recalbox-next.systemview=1-vertical left system.firsttimeuse=0 global.quitpresstwice=0 scraper.screenscraper.thumbnail=box3d scraper.screenscraper.manual=1 scraper.screenscraper.maps=0 scraper.screenscraper.p2k=0 scraper.screenscraper.video=none gb.flatfolder=0 gb.sort=0 emulationstation.gb.filteradultgames=0 emulationstation.clock=1 system.kblayout=us system.timezone=US/Eastern wifi.ssid=new ssid emulationstation.pcengine.filteradultgames=0 pcengine.sort=0 pcengine.flatfolder=0 emulationstation.pcengine.regionfilter=0 emulationstation.n64.filteradultgames=0 n64.sort=0 n64.flatfolder=0 emulationstation.n64.regionfilter=0 -
@Antarnis bonjour, pour ton problème d'image qui sort de l'écran cela se règle sur le moniteur ou la tv sans problème, sur mon trinitron c'était depuis le service menu mais sur un pvm tu as un process a suivre depuis le service manual
https://elektrotanya.com/sony_pvm-14l2_pvm-20l2.pdf/download.html#dlune video de quelqu'un qui fait les réglages
https://www.youtube.com/watch?v=o-MquBghtDgle soft qu'il utilise et que j'utilise aussi pour faire mes réglages d'écran, je prend la version snes et je la lance depuis recalbox et la j'ai une bonne mire de réglage
-
Merci beaucoup @Valgri75 pour les infos, je vais regarder cela de près!
Pour le config.txt que j'ai mis, du coup comment je peux être sûr que les options sont bonnes, y compris le fait que je force tous les émulateurs en tourner en paramètres par défaut:
...snes.videomode=default
nes.videomode=default
n64.videomode=default
gba.videomode=default
gb.videomode=default....Merci pour votre aide!
-
est ce que comme dans le tuto tu as bien créer les fichier *.cfg
exempleHere is the content of my nes.cfg file
aspect_ratio_index = "22"
video_smooth = "false"
video_scale_integer = "false"
video_threaded = "false"
custom_viewport_width = "1680"
custom_viewport_height = "224"
custom_viewport_x = "118"
custom_viewport_y = "17" -
non @Valgri75 j'ai édité celui dans Recalbox via l'interface web...
ce que tu as collé, je le met où dans le config.txt?
-
non tu créer sur ton pc un fichier nes.cfg , tu l'édite avec le bloc note et tu colle le contenu, tu enregistre puis tu le met sur ta recalbox /system/configs/retroarch/
-
Je ne vois pas recalbox /system/configs/retroarch/ ni le dossier où mettre les ROMS, je vais reformater / install pour partir d'un système propre et essayer
Merci
-
/share/system/configs/retroarchLe chemin partait de share directement, juste non précisé.
-
@Pitch64 said in Recalbox 7.1.1 sur CRT / PVM:
/share/system/configs/retroarchLe chemin partait de share directement, juste non précisé.
oui c'est plus juste si l'on passe par le reseau, comme j'ai l'habitude de passer par l'usb a cause de problème avec les fichier de plus de 500 mo sur mon rpi3 , du coup j'ai oublier de le préciser, désolé
