Problème power script
-
@lainbebop C'est effectivement le comportement attendu.
Tu Peux essayer le PIN356PUSHRESET avec ton bouton câblé sur 5 et 6 et quand tu feras un appuye court, ça quittera l'ému.
Attention cependant, un appuye long éteindra le Pi.
-
@supernature2k il aurait peut-être fallu inverser la logique ?
 autant se tromper sur un appui court
-
@substring Heu oui en fait c'est le cas... j'Edit le post


-
@supernature2k @Substring
Comment ça ? Comment obtenir le comportement décrit dans le wiki ?Pression courte (éteint) : allumer votre Recalbox
Pression courte (allumé) : quitter l’émulateur en cours et revenir au menu principal
Pression longue (allumé) : éteindre proprement votre Recalbox (équivaut à faire START > Quitter > Éteindre normalement)Merci!
-
@lainbebop oui ça c'est le comportement attendu de PIN356PUSHRESET
-
@supernature2k said in Problème power script:
PIN356PUSHRESET
J'ai testé, Appui court = le Pi s'éteint d'un coup (pas équivalent à start/quitter !!)
Comment arriver au fonctionnement écrit dans le Wiki ?
j'aimerais :
Pression courte : quitte l'émulateur
Pression longue : éteint le Pi proprement (start/quitter)NB : voici la ligne que j'ai rajouté dans le recalbox.conf :
system.power.switch=PIN356PUSHRESET -
@lainbebop je ne sais que dire, le script fonctionne correctement chez moi
-
@supernature2k bon
 je vais faire la dernière MAJ et si ça ne marche pas je vais reinstaller
C’est peut être du au fait que j’ai installé le script du wiki ? J’ai envoyé la ligne « uninstall » pourtant, mais ça a peut-être modifié des fichiers

-
@lainbebop c'est possible oui
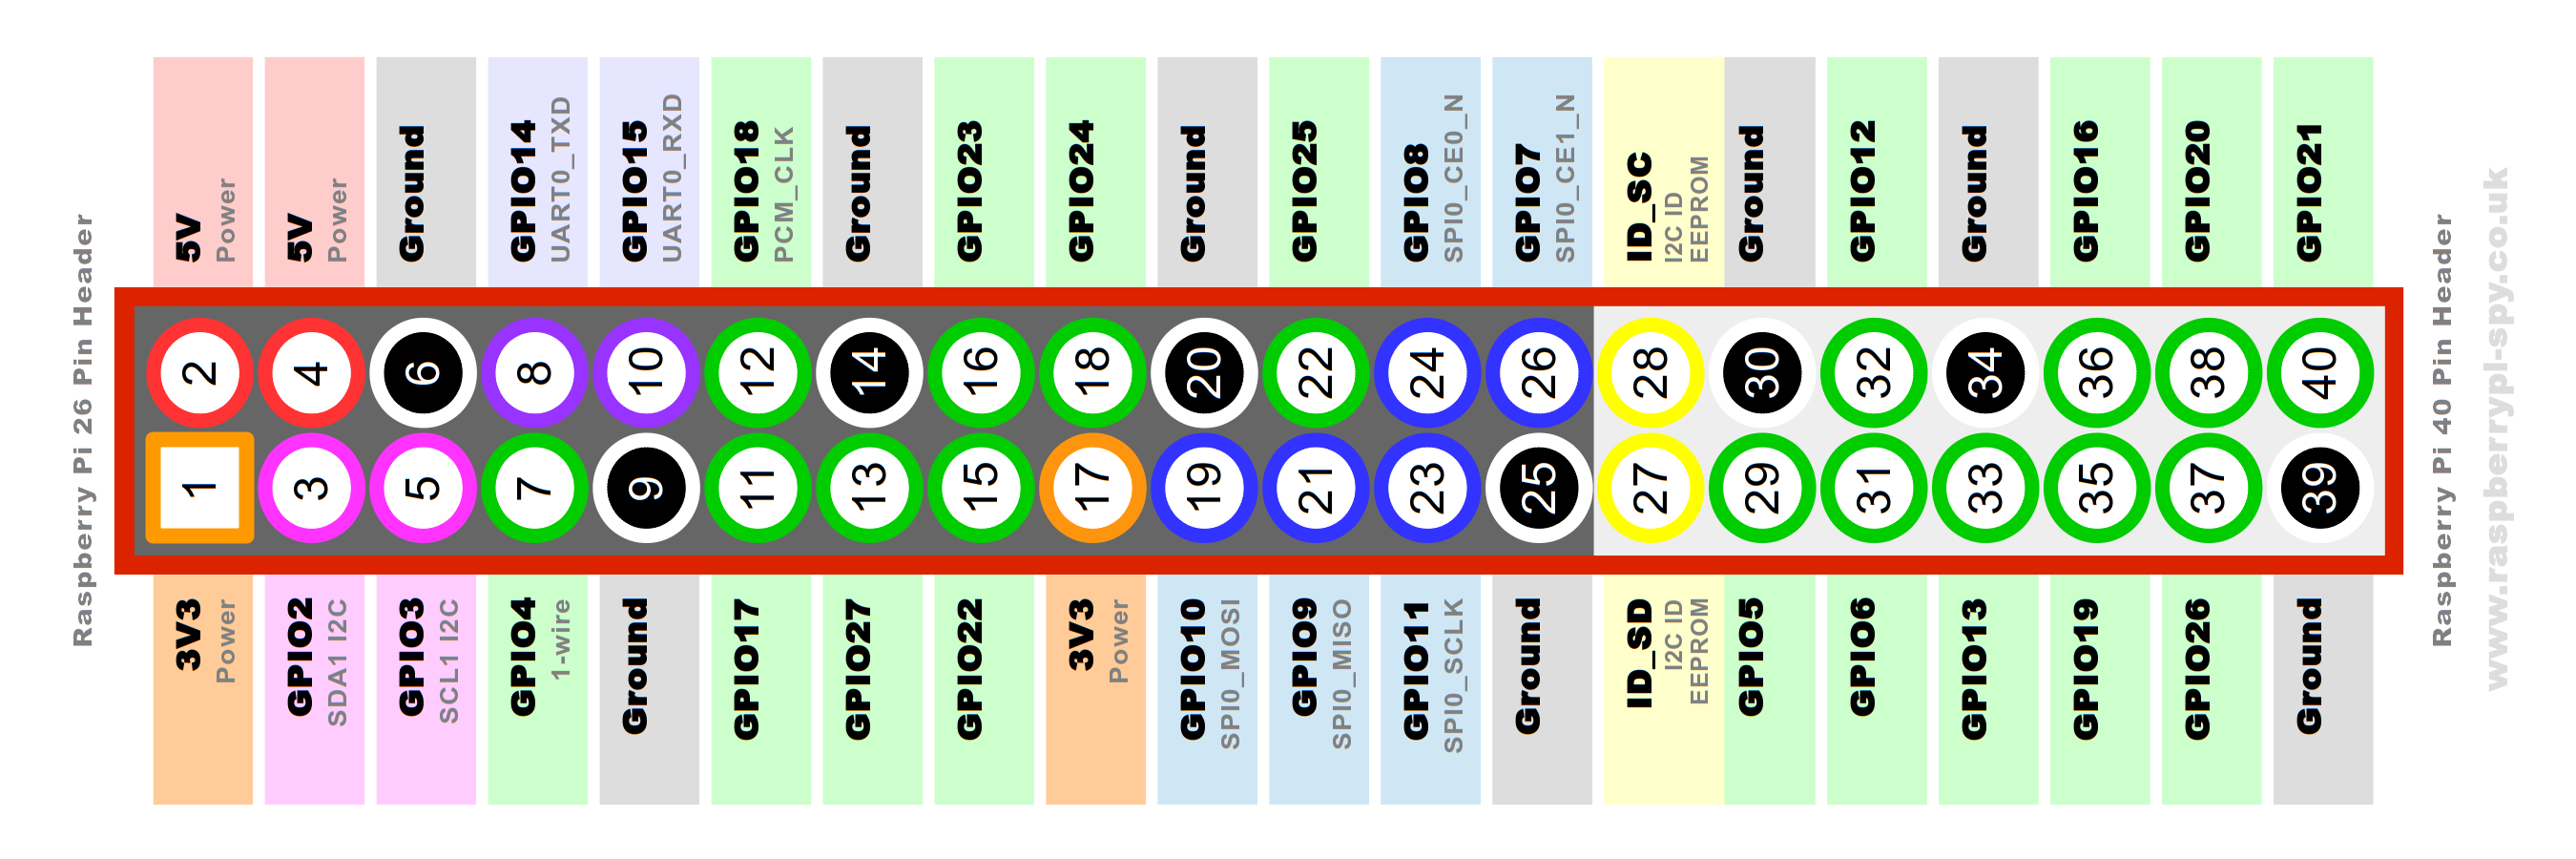
prends bien le PIN356PUSHRESET et cable bien le + sur le pin 5 (GPIO3) et le - sur le pin 6 (GND)
-
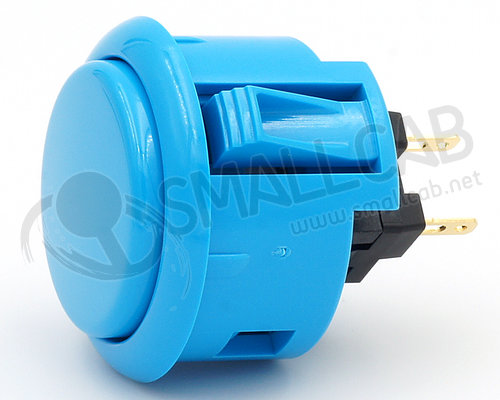
@supernature2k alors en gros j’ai un cable qui va du pin3 au bouton sanwa et un cable qui va du pin6 au bouton sanwa. Je ne savais pas qu’il y avait une polarité ?
Pour la ligne dans recalbox.conf c’est bien celle ci !
-
@lainbebop non y a pas vraiment de polarité si c'est un bouton simple. Par contre PIN 3?!?
PIN 3 c'est pour RESET
-
-
j'ai exactement le même problème lainbebop. J'ai brancher sur 5 et 6 avec un bouton poussoir, configurer PIN356PUSHRESET mais quand je suis dans un émulateur ça fait un hard reset. Bizarrement cela fonctionne bien que sur nintendo 64 mais pour les autres consoles cela fait un hard reset.
-
@supernature2k @Tactys
J'ai fait la dernière MAJ,- Appui long : rien
- Appui court : rien
- 2 appuis courts : Pi éteint (hard :/)
Tu as aussi tenté d'installer le script sur cette page @Tactys ?
-
@lainbebop J'ai fait la dernière Maj aussi mais j'ai pas installer le script.
-
@lainbebop Hi,
J'ai refait un test hier sur une recalbox fraîchement mise à jour et j'ai bien le comportement attendu sur les deux boutons.Peux tu re-verifier ton recalbox.conf et ton cablage?
-
(on doit tagger et mettre le text dans 2 posts séparés sinon "flagged as spam
 )
) -
This post is deleted! -
Voici le recalbox.conf ! A noter qu'avant la MAJ ne n'avais pas le PIN356PUSHRESET que je l'ai ajouté, et qu'après la MAJ j'avais 10fois cette ligne et plus les autres (qui étaient commentés ";"!) j'ai donc tout supprimé pour ne laisser que celui là :
# System Variable
# You can configure your recalbox from here
# To set a variable, remove the first ; on the line


# ------------ A - System Options ----------- #
#    Uncomment the system.power.switch you use
system.power.switch=PIN356PUSHRESET


## fbcp FrameBuffer Copy Program
## For small TFT screen on GPIO and SPI
## See https://github.com/recalbox/recalbox-os/wiki/Utility---Use-of-fbcp-for-small-TFT-screen-%28EN%29 for details
## Needed for Waveshare 3.2" 3.5" TFT screen, 2.8" Adafruit screen
## See https://github.com/recalbox/recalbox-os/wiki/TFT-Screen-SPI-Bus-%28EN%29
## for support and configuration details needed by /boot/config.txt
system.fbcp.enabled=0

## Recalbox Manager (http manager)
system.manager.enabled=1
## 1 or 2, depending on the manager version you wish
system.manager.version=2

## Recalbox security
# enforce security
#   samba password required
#   disable virtual gamepads
system.security.enabled=0

## Recalbox API (REST)
system.api.enabled=0

## Allow a specific resolution for ES only from the command : tvservice -m [MODE]
## Leave commented for the default usual behaviour
;system.es.videomode=CEA 4 HDMI

## EmulationStation
### menu style
### default -> default all options menu
### none -> no menu except the game search menu
### bartop -> less menu, only needed for bartops
emulationstation.menu=default
### Select a system to show on boot (use rom directory name) (string)
emulationstation.selectedsystem=favorites
### Show the gamelist of the first or selected system on boot (0,1)
emulationstation.bootongamelist=0
### Disable system view ES will boot and show ONLY the first or selected system (0,1)
emulationstation.hidesystemview=0
### Pa**e Gamelists only. Show only games listed in gamelist.xml files (0,1)
emulationstation.gamelistonly=0
### Force basicgameList view to be displayed, even if your game systems are scraped (0,1)
emulationstation.forcebasicgamelistview=0

## Emulator special keys
## default -> default all special keys
## nomenu -> cannot popup the emulator menu
## none -> no special keys in emulators
system.emulators.specialkeys=default

## Show or hide kodi in emulationstation (0,1)
kodi.enabled=1
## Start kodi at launch (0,1)
kodi.atstartup=0
## set x button shortcut (0,1)
kodi.xbutton=0

## Allow a specific resolution for Kodi only from the command : tvservice -m [MODE]
## By default is using the default resolution of your screen
kodi.videomode=default

## Kodi can wait for a network component before starting
## waithost is the ip or hostname that must answer to a ping to validate the availability
## waittime is the maximum time waited when kodi boots
## if waitmode is required, kodi will not start if the component is not available
## if waitmode is wish, kodi will start if the component is not available
## if waitmode is not set or has another value, kodi will start immediately
;kodi.network.waitmode=required
;kodi.network.waittime=10
;kodi.network.waithost=192.168.0.50

## Hyperion
## Hyperion allows you to use an ambilight like led system on your recalbox
## Use hypercon to create your configuration file, and copy it in /recalbox/share/system/configs/hyperion/hyperion.config.json
hyperion.enabled=0


# ------------ B - Network ------------ #
## Set system hostname
system.hostname=RECALBOX
## Activate wifi (0,1)
wifi.enabled=1
## Wifi SSID (string)
wifi.ssid=Livebox-CF56
## Wifi KEY (string)
## after rebooting the recalbox, the "new key" is replace by a hidden value "enc:xxxxx"
## you can edit the "enc:xxxxx" value to replace by a clear value, it will be updated again at the following reboot
## Escape your special chars (# ; $) with a backslash : $ => \$
wifi.key=enc:U2FsdGVkX19bTpsXwvHmV1S+UUKJMMot/DmZYLtq8TNmN0c3xQdMHgSLwcUFCnxi

# secondary wifi (not configurable via the user interface)
;wifi2.ssid=new ssid
;wifi2.key=new key

# third wifi (not configurable via the user interface)
;wifi3.ssid=new ssid
;wifi3.key=new key

## Samba share
system.samba.enabled=1
### Virtual Gamepads
system.virtual-gamepads.enabled=1
### SSH
system.ssh.enabled=1

# ------------ C - Audio ------------ #
## Set the audio device (auto, hdmi, jack)
audio.device=jack
## Set system volume (0..100)
audio.volume=77
## Enable or disable system sounds in ES (0,1)
audio.bgmusic=1


# -------------- D - Controllers ----------------- #
# Enable support for standard bluetooth controllers
controllers.bluetooth.enabled=1


## Please enable only one of these
# -------------- D1 - PS3 Controllers ------------ #
##Enable PS3 controllers support
controllers.ps3.enabled=1
## Choose a driver between bluez, official and shanwan
## bluez -> bluez 5 + kernel drivers, support official and shanwan sisaxis
## official -> sixad drivers, support official and gasia sisaxis
## shanwan -> shanwan drivers, support official and shanwan sisaxis
controllers.ps3.driver=bluez


# ------------ D2 - GPIO Controllers ------------ #
## GPIO Controllers
## enable controllers on GPIO with mk_arcarde_joystick_rpi (0,1)
controllers.gpio.enabled=0
## mk_gpio arguments, map=1 for one controller, map=1,2 for 2 (map=1,map=1,2)
controllers.gpio.args=map=1,2


# ------------ D3 - Steam Controllers ------------ #
## Enable steam controller service
controllers.steam.enabled=0


## DB9 Controllers
## Enable DB9 drivers for atari, megadrive, amiga controllers (0,1)
controllers.db9.enabled=0
## db9 arguments
controllers.db9.args=map=1

## Gamecon controllers
## Enable gamecon controllers, for nes, snes psx (0,1)
controllers.gamecon.enabled=0
## gamecon_args
controllers.gamecon.args=map=1

## XGaming's XArcade Tankstik and other compatible devices
controllers.xarcade.enabled=1


# ------------ F - Language and keyboard ------------ #
## Set the language of the system (fr_FR,en_US,en_GB,de_DE,pt_BR,es_ES,it_IT,eu_ES,tr_TR,zh_CN)
system.language=fr_FR
## set the keyboard layout (fr,en,de,us,es)
system.kblayout=fr
## Set you local time
## Select your timezone from : ls /usr/share/zoneinfo/ (string)
system.timezone=Europe/Paris


# ------------ G - UPDATES ------------ #
## Automatically check for updates at start (0,1)
updates.enabled=1
# Update type : default to stable
updates.type=stable


# ------------ H - HERE IT IS - GLOBAL EMULATOR CONFIGURATION ------------ #
## The global value will be used for all emulators, except if the value
## is redefined in the emulator

## Set game resolution for emulators
## select your mode from the command : tvservice -m [MODE]
## CEA 5 HDMI : 1920x1080 @ 60Hz 16:9, clock:74MHz interlaced
## CEA 4 HDMI : 1280x720 @ 60Hz 16:9, clock:74MHz progressive
## use 'default' for using the default resolution
## use 'auto' : switches to CEA 4 HDMI if supported, else keep the current resolution
## (string)
global.videomode=DMT 9 HDMI

## Shader set
## Automatically select shaders for all systems
## (none, retro, scanlines)
global.shaderset=none

## Once enabled, your screen will be cropped, and you will have a pixel perfect image (0,1)
global.integerscale=0

## Set gpslp shader for all emulators (prefer shadersets above). Absolute path (string)
global.shaders=

## Set ratio for all emulators (auto,4/3,16/9,16/10,custom)
global.ratio=auto

## Set smooth for all emulators (0,1)
global.smooth=1

## Set rewind for all emulators (0,1)
global.rewind=0

## Set autosave/load savestate for all emulators (0,1)
global.autosave=0

## Enable retroarchievements (0,1)
## Set your www.retroachievements.org username/password
## Escape your special chars (# ; $) with a backslash : $ => \$
global.retroachievements=0
global.retroachievements.hardcore=0
global.retroachievements.username=
global.retroachievements.password=

## Set retroarch input driver (auto, udev, sdl2)
## If you don't have issues with your controllers, let auto
global.inputdriver=auto

## If you do not want recalboxOS to generate the configuration for all emulators (string)
;global.configfile=/path/to/my/configfile.cfg

# ------------ I - EMULATORS CHOICES ----------- #
## You can override the global configuration here
## Here is the snes example
;snes.videomode=CEA 4 HDMI
snes.core=snes9x_next
;snes.shaders=/recalbox/share/shaders/shaders_glsl/mysnesshader.gplsp
snes.ratio=4/3
;snes.smooth=0
;snes.rewind=1
;snes.autosave=0
;snes.emulator=libretro
;snes.integerscale=0
## If you do not want recalboxOS to generate the configuration for the emulator :
;snes.configfile=/path/to/my/configfile.cfg

## Default cores for RPi3
snes.core=snes9x_next
gba.core=mgba
mame.core=mame078
nes.core=quicknes

## NeoGeo emulator
## You can use pifba or a libretro core (fba2x,libretro)
neogeo.emulator=libretro
## If you set libretro as neogeo.emulator, the line below sets the retroarch core (fba,imame4all)
neogeo.core=fba

## N64 emulator is configured to display a screen with a 640x480 resolution (native n64 resolution)
## So you must use one of these video modes (DMT 4 HDMI,CEA 1 HDMI).
## If your screen is not compatible with one of these video modes, please check the recalbox's wiki.
n64.videomode=DMT 4 HDMI
## If you are using a CRT screen, please change the setting above with this one :
# n64.videomode=default

## Dreamcast emulator
## Like N64, such a CPU intensive emulator needs a small resolution
## Consider DMT 4 HDMI (640*480) or DMT 9 HDMI (800*600). If you have a black screen on dreamcast, try DMT 9 HDMI here
dreamcast.videomode=DMT 4 HDMI

## Configurations generated by Recalbox
system.es.menu=default
controllers.xboxdrv.enabled=0
controllers.xboxdrv.nbcontrols=2
fba.ratio=4/3
mame.ratio=4/3
nes.ratio=auto
nes.emulator=libretro
psx.ratio=4/3
psx.rewind=0
fba.rewind=0
Pour les branchements, j'ai juste 2 fils qui partent du bouton, directements branchés sur le GPIO :


Merci de ton aide !
-
@lainbebop la conf et les branchements sont bons

Peux-tu vérifier que le fichier existe bien?
Tu dois avoir un fichier
rpi-pin356-power.pysous/recalbox/scripts/


